You pull your homemade loaf from the oven. The crust is golden, the smell is divine. You wait, slice into it, and... it's dry. Crumbs fly everywhere. The texture is more like sawdust than the soft, tender crumb you dreamed of. I've been there. After a decade of baking, I've learned that moist bread isn't just luck; it's a science you can control from the mixing bowl to the bread box.
The quest for moisture is really a fight against staling. Staling isn't just drying out—it's the starch molecules in your bread recrystallizing, which pushes out water and makes the crumb firm. To win, you need a three-part strategy: the right recipe, perfect baking, and smart storage. Most guides miss how these stages connect.
What's Inside: Your Quick Moisture Guide
Why Bread Goes Dry: It's Not What You Think
Let's clear something up first. A dry loaf isn't always an under-hydrated loaf. You can have a high-water dough that still turns out crumbly. The real issue is water retention. Where does the water go? It either evaporates during baking or gets "pushed out" by starch retrogradation (that fancy term for staling).
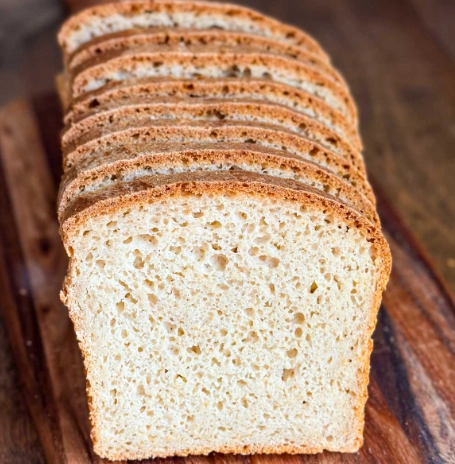
Think of your bread's structure like a sponge. A good sponge holds water tightly. A bad one lets it drip out. Your goal is to create a sponge-like crumb with ingredients and techniques that lock moisture in.
Here's a mistake I made for years: I assumed a crispy crust meant a dry interior. Not true. A well-formed, crackly crust actually seals in steam during baking, protecting the moist crumb inside. The enemy is often over-baking or wrong storage, not the crust itself.
Building Moisture Into Your Recipe: The Ingredient Game
This is where the magic starts. Every ingredient plays a role. It's not about adding more of one thing; it's about balance.
Pro Insight: According to resources from the American Bakers Association, understanding the function of "dough conditioners" like fats and sugars is key to commercial soft breads. We can mimic this at home with simple pantry staples.
The Moisture Dream Team (Ingredients That Hold Water)
- Fats (Butter, Oil, Eggs): These coat the flour's gluten strands and starch molecules, creating a barrier that slows down moisture loss. They also tenderize the crumb. A tablespoon or two of olive oil or melted butter in a standard loaf formula works wonders.
- Sugars (Honey, Brown Sugar, Malt Syrup): Sugars are humectants. They attract and hold onto water molecules. Swap white sugar for honey or brown sugar in your recipe. The difference in shelf life is noticeable.
- Dairy & Potatoes (Milk, Yogurt, Mashed Potato): This is the secret weapon. Milk softens the crumb, and potatoes are starch superstars. Adding 50-100g of leftover mashed potato (or a few tablespoons of potato flour) to your dough gives you that iconic, moist sandwich bread texture that lasts for days.
- Tangzhong or Yudane (Water Roux): This Asian baking technique involves cooking a portion of the flour and water into a paste before adding it to the dough. The gelatinized starch can hold absurd amounts of water, resulting in famously soft, springy breads like Japanese milk bread. It's a game-changer.
Let's compare two hypothetical loaves:
| Ingredient | "Lean" Basic Loaf | "Enriched" Moist Loaf | Moisture Effect |
|---|---|---|---|
| Fat | None | 2 tbsp Olive Oil | Coats starch, slows staling. |
| Sweetener | 1 tbsp White Sugar | 2 tbsp Honey | Humectant, holds water. |
| Special Add-in | None | 80g Mashed Potato | Dramatically improves water retention. |
| Expected Freshness | Best Day 1, stale by Day 2 | Soft through Day 3-4 | Clear winner for moist texture. |
Baking for Moisture: The Oven's Role
You can have a perfect dough and ruin it in the oven. Baking is about managing heat and steam.
Steam is non-negotiable. In the first 10-15 minutes of baking, a steamy oven allows the crust to expand slowly, setting a thin, elastic shell. This keeps the interior's moisture from rushing out too soon. No professional bakery bakes bread without steam.
At home, toss a handful of ice cubes into a preheated pan on the oven floor when you load your bread. Or spray the oven walls quickly with water (avoid the light).
Don't over-bake. This sounds obvious, but it's the most common error. Bread is done when it reaches an internal temperature of 190-210°F (88-99°C), depending on the type. A digital thermometer is a better guide than color alone. A dark crust can hide a perfectly moist interior, but an extra 10 minutes can bake all that precious water right out.
Watch Out: The "hollow sound" when tapping the bottom is a good indicator, but not foolproof for enriched, moist loaves. These denser breads might sound less hollow even when done. Trust the thermometer.
Keeping It Moist: Storage Is Half the Battle
Here's where most people fail. Your countertop, fridge, and freezer are not created equal for bread storage.
The Golden Rule: Never refrigerate bread you plan to eat within a few days. The fridge's cool temperature is the perfect environment to accelerate starch retrogradation (staling). Your bread will go rock-hard faster than if you left it on the counter.
The Best Practice:
1. Day 1: Cool completely on a wire rack. Once cool, store at room temperature in a bread box or a paper bag. This allows just enough airflow to prevent mold but keeps the crust from softening too much.
2. Day 2+: If you won't finish it, slice and freeze it. Freezing halts staling. Thaw slices in a toaster or at room temperature. For a whole loaf, wrap tightly in foil and freeze. Reheat in the oven wrapped in foil.
Plastic bags trap moisture and can make the crust soggy, encouraging mold on moist loaves. Use them only for very short-term storage or for freezing.
The Rescue Mission: Fixing a Dry Loaf
All is not lost. You can revive a stale loaf. The microwave is tempting but often makes things worse—it heats unevenly and can create tough, chewy spots.
The best method is re-steaming.
1. Preheat your oven to 300°F (150°C).
2. Lightly run the entire loaf under the tap or sprinkle it with water.
3. Wrap it loosely in aluminum foil.
4. Bake for 10-15 minutes until warm.
The steam from the wet crust penetrates and rehydrates the bread from the outside in. It won't be like fresh-baked, but it'll be soft, warm, and perfect for toast or sandwiches.
Your Moisture Questions, Answered
 Making moist bread is a skill, not a mystery. It starts with choosing ingredients that hold water, continues with baking that seals it in, and finishes with storage that protects it. Skip one step, and the result suffers. Master all three, and you'll never have to suffer through a dry sandwich again. Start with adding a spoonful of honey and a dollop of mashed potato to your next loaf. You'll feel the difference.


Leave a Comment