Let's be honest. The idea of baking your own wedding cake sounds equal parts romantic and utterly terrifying. I've been a pastry chef for over a decade, and I still remember the first time a friend asked me to make theirs. The pressure is real. But here's the secret I wish someone had told me: with the right recipe, planning, and a few non-negotiable techniques, it's an incredibly rewarding project that can save you a fortune and add a deeply personal touch to your day. This isn't just another list of ingredients. This is the blueprint I use for professional-tier wedding cakes, broken down so you can succeed.
What You'll Find Inside
- Why Bake Your Own Wedding Cake?
- Essential Tools and Ingredients
- The Foundation: A Classic Tiered Vanilla Wedding Cake Recipe
- Beyond Vanilla: Flavor Variations and Fillings
- The Art of Frosting: Buttercream vs. Fondant
- Assembly and Stacking: The Structural Challenge
- Decoration: From Simple Elegance to Show-Stopping
- FAQs: Your Wedding Cake Baking Questions Answered
Why Bake Your Own Wedding Cake?
Cost is the obvious one. A custom wedding cake can easily run into the hundreds or thousands. Baking it yourself cuts that down to the cost of ingredients—maybe $100-$200 for a stunning multi-tier cake. But the real value is in the story. It's a act of love, a centerpiece with genuine meaning. I've seen couples bake together as a pre-wedding ritual. Just manage your expectations. This isn't a last-minute Thursday night project. It's a commitment.
Essential Tools and Ingredients You Cannot Skip
You can't build a house without a foundation and good tools. Same goes for a wedding cake. Don't try to wing it with what's in your drawer.
The Non-Negotiable Hardware: Multiple cake pans (6-inch, 8-inch, 10-inch are a standard set), a turntable (this changes everything), an offset spatula, a bench scraper for smooth sides, a kitchen scale (volumetric cups are too inconsistent for this), and cake boards and dowels or support straws for each tier. The dowels are what prevent your beautiful creation from becoming a leaning tower of Pisa by the end of the reception.
Ingredient Quality Matters: Use real, high-fat butter (European-style like Kerrygold or Plugrá makes a noticeable difference in flavor and crumb). Get pure vanilla extract or paste, not imitation. For the flour, I swear by a good unbleached all-purpose like King Arthur. Cake flour is finer, but all-purpose gives a sturdier structure for stacking, which is more important than ultra-fluffiness here.
The Foundation: A Classic Tiered Vanilla Wedding Cake Recipe
This is my workhorse recipe. It's dense enough to handle stacking and carving but stays moist for days. It's a blank canvas for flavors. The key is the reverse creaming method, which coats the flour in fat first, resulting in a finer, more even crumb that's less likely to dome.
Ingredients (For one 8-inch round, 3-layer tier):
- 680g (5 ½ cups) unbleached all-purpose flour
- 600g (3 cups) granulated sugar
- 1 tbsp + 1 tsp baking powder
- 1 tsp fine sea salt
- 340g (1 ½ cups) unsalted butter, cold and cubed
- 480ml (2 cups) whole milk, at room temperature
- 8 large eggs, at room temperature
- 2 tbsp pure vanilla extract
- 240ml (1 cup) sour cream, at room temperature
Step-by-Step Method:
- Prep: Preheat oven to 160°C (325°F). Grease, line with parchment, and flour your cake pans. Do not skip the parchment.
- Dry Mix: In the bowl of a stand mixer fitted with the paddle attachment, combine flour, sugar, baking powder, and salt. Mix on low for 30 seconds.
- Cut in Butter: Add the cold, cubed butter. Mix on low until the mixture resembles coarse sand with some pea-sized butter bits remaining. This usually takes 3-4 minutes. This step is crucial for texture.
- Wet Ingredients: In a separate jug, whisk together milk, eggs, vanilla, and sour cream until just combined.
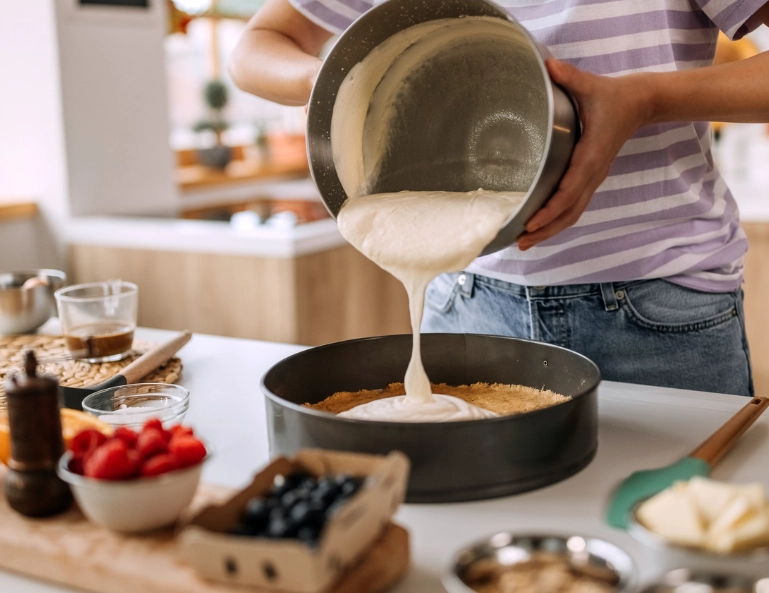
- Combine: With the mixer on low, slowly pour in about ¾ of the wet ingredients. Mix for 1 minute. Scrape down the bowl. Add the remaining wet ingredients and mix for another 30-45 seconds until the batter is mostly smooth. A few small lumps are fine; overmixing is the enemy.
- Bake: Divide batter evenly between the prepared pans (use your scale!). Bake for 45-55 minutes, or until a skewer comes out clean. The cake will spring back when lightly touched.
- Cool: Let cool in pans for 20 minutes, then turn out onto a wire rack to cool completely. Wrap tightly in plastic wrap and freeze for at least 4 hours, preferably overnight. Frozen cake is infinitely easier to trim, level, and frost without crumbs.
Beyond Vanilla: Flavor Variations and Fillings
Vanilla is classic for a reason, but your cake should taste like you. The mistake I see is adding wet ingredients (like fruit purees) directly to the main batter, which throws off the structure. Instead, flavor the fillings and frostings.
Popular & Stable Flavor Twists:
Lemon: Add the zest of 3 lemons to the dry ingredients. Fill with lemon curd and raspberry preserves.
Chocolate: Replace 100g of flour with 80g of high-quality cocoa powder (like Valrhona). Fill with chocolate ganache and cherry compote.
Almond: Replace 2 tsp of vanilla with 1 ½ tsp pure almond extract. Fill with amaretto-soaked cherries and vanilla buttercream.
Filling Rules: Keep fillings at least 1 cm from the edge of the cake layer. This creates a "dam" of frosting around the edge that prevents slippery fillings from oozing out and compromising the stack. Use a piping bag to make a buttercream dam—it's cleaner than using a spoon.
The Art of Frosting: Buttercream vs. Fondant
This is the big aesthetic and practical decision. Here’s a brutally honest comparison.
| Aspect | Swiss Meringue Buttercream | Rolled Fondant |
|---|---|---|
| Taste & Texture | Silky, not too sweet, melts in your mouth. Universally loved. | Sweet, chewy, plasticky. Many people peel it off. Store-bought can taste terrible. |
| Difficulty | Medium. Requires a candy thermometer and patience, but very forgiving to smooth. | High. Rolling evenly, covering without tears or wrinkles is a skill. Dries out quickly. |
| Appearance | Beautifully smooth "naked" or semi-naked look, or perfect sharp edges with technique. Can't do intricate sculpting. | Provides a flawless, porcelain-like canvas. Essential for detailed sculpting, sharp edges, and certain decorations. |
| Stability | Stable at room temperature but can soften in extreme heat. Must be refrigerated. | Creates a protective shell. Very stable in most conditions. Doesn't need refrigeration. |
| My Verdict for DIY | Winner for most. Tastes incredible, easier to work with, and the "less perfect" look is trendy and charming. | Only attempt if you are committed to practice and your heart is set on a specific sculpted design. |
If you go with buttercream (my strong recommendation), make a Swiss Meringue Buttercream. It's less sweet than American buttercream and holds up better. The basic formula is 5 large egg whites, 250g sugar, and 340g butter, flavored with vanilla. You cook the egg whites and sugar over a bain-marie to 71°C (160°F) before whipping into a meringue, then adding the butter piece by piece.
Assembly and Stacking: The Structural Challenge
This is where most DIY cakes fail. It's not about the recipe; it's about engineering.
- Level & Tort: Once frozen, level the top of each cake with a serrated knife. You can also slice each tier horizontally into 2 or 3 layers for more filling.
- Crumb Coat: Place the first layer on a cake board (same size as the tier). Spread a thin layer of frosting. Add filling, staying inside your buttercream dam. Add next layer. Repeat. Frost the entire tier with a very thin "crumb coat" to seal in crumbs. Chill for 30 minutes.
- Final Frost: Apply a thick, even layer of final frosting. Use your bench scraper on the turntable to get smooth sides. Chill again.
- The Critical Support Step: For the bottom tier, insert 4-5 plastic dowels or thick paper straws into the cake, arranged in a circle slightly smaller than the tier that will sit on top. Use the top tier's cake board as a guide. Cut the dowels perfectly flush with the height of the frosting. This platform will bear the weight.
- Stack: Carefully place the next tier, on its own board, directly onto the support dowels. Never stack cake directly on cake. Repeat for subsequent tiers.
Decoration: From Simple Elegance to Show-Stopping
You've built a stable, delicious cake. Now for the fun part. Keep it simple for your first attempt.
Fresh Flowers: The easiest showstopper. Consult a florist to ensure flowers are non-toxic and pesticide-free. Do not stick stems directly into the cake. Wrap stems in floral tape and insert into a food-safe flower pick or a small piece of bubble tea straw placed in the cake.
Fruit & Greenery: Berries, figs, or sprigs of rosemary or thyme pressed into the buttercream sides look modern and effortless.
Textured Buttercream: Use different spatulas or combs to create waves, stripes, or a rustic "swept" look. This hides minor imperfections beautifully.
Drip Cake: Pour slightly cooled ganache over the chilled top tier and let it drip down the sides. Looks professional, tastes amazing, and is surprisingly easy.
Leave a Comment