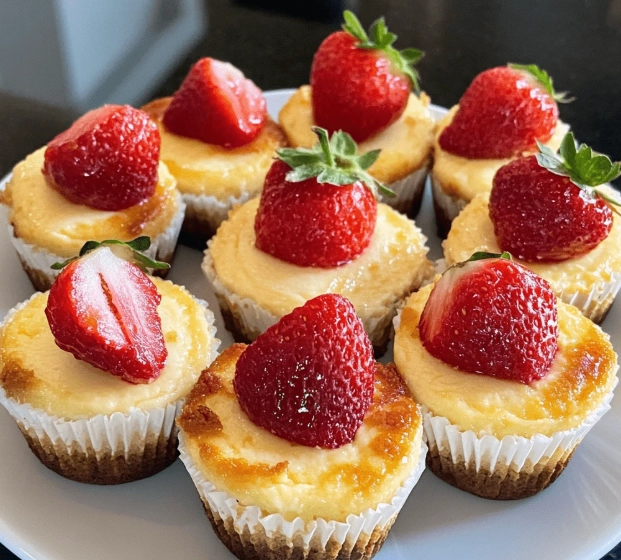
Let's be honest. The idea of making a baked cheesecake can be intimidating. You've probably heard the horror stories: giant cracks down the middle, a soggy crust, or a texture that's more like scrambled eggs than creamy luxury. I've been there. My first attempt looked like a miniature earthquake zone. But after years in the kitchen (and more than a few failed experiments), I've nailed down a method that works every single time. This isn't just another recipe; it's a deep dive into the why behind each step, designed to give you the confidence and knowledge to bake a flawless, classic New York-style cheesecake.
What You'll Learn in This Guide
Why a Baked Cheesecake Beats No-Bake Every Time
No-bake cheesecakes have their place—they're quick and light. But if you're after that iconic, dense, velvety-smooth texture that melts on your tongue, baking is the only way. The heat does something magical: it sets the eggs and cream cheese into a firm yet creamy custard. It toasts the graham cracker crust into a sturdy, buttery base that can actually support a slice. The flavor is richer, more complex, and frankly, more satisfying. It's the difference between a good dessert and a legendary one.
Ingredient Secrets: This is Where Most People Go Wrong
You can't build a masterpiece with subpar materials. Here’s the breakdown of what you need and, more importantly, why.
| Ingredient | Quantity | Pro-Tip & Purpose |
|---|---|---|
| Full-Fat Cream Cheese (brick-style) | 32 oz (4 blocks) | Non-negotiable. Use Philadelphia or a similar brick cream cheese. Tub-style or low-fat versions have more water and stabilizers, leading to a weepy, less stable filling. Take it out of the fridge 2-3 hours before. |
| Granulated Sugar | 1 cup | Sweetens and helps stabilize the structure. Some recipes use more, but this amount lets the tangy cheese flavor shine. |
| Sour Cream (full-fat) | 1 cup | The secret weapon for extra creaminess and a subtle tang. Greek yogurt can work in a pinch, but sour cream is superior for texture. |
| Large Eggs (room temp) | 4 | They provide structure. Cold eggs can re-solidify bits of cream cheese, causing lumps. Room temp eggs incorporate smoothly. |
| Pure Vanilla Extract | 2 tsp | Enhances flavor. Don't skip or use imitation. |
| Graham Cracker Crumbs | 2 cups | For the classic crust. You can buy pre-crumbed or pulse whole crackers in a food processor. |
| Unsalted Butter (melted) | 1/2 cup | Binds the crust. Using unsalted lets you control the salt level. |
| A Pinch of Salt | 1/4 tsp | Balances the sweetness and enhances all other flavors. |
The Biggest Mistake I See: Temperature
Every single ingredient for the filling—cream cheese, eggs, sour cream—must be at room temperature. I can't stress this enough. Cold cream cheese will never become perfectly smooth, no matter how long you mix it. You'll end up with a lumpy batter, which bakes into a grainy texture. Plan ahead. Take everything out 2-3 hours before you start baking.
The Step-by-Step Process, Demystified
Follow this sequence for a flawless result.
1. The Crust: Building a Solid Foundation
Preheat your oven to 325°F (163°C). Mix the graham cracker crumbs, melted butter, and a tablespoon of the sugar until it resembles wet sand. Press it firmly and evenly into the bottom of a 9-inch springform pan. I mean really press it—use the bottom of a glass or a measuring cup to compact it. A loose crust will crumble when you cut slices. Bake it alone for 10 minutes, then let it cool on a rack while you make the filling. This pre-baking ("blind baking") sets the crust and prevents sogginess.
2. The Filling: Patience is Your Friend
In the bowl of a stand mixer fitted with the paddle attachment (a hand mixer works too), beat the room-temperature cream cheese on medium-low speed until it's completely smooth and creamy. This takes about 2 minutes. Scrape down the bowl and beater thoroughly.
Now, add the sugar. Beat on low until just combined. Scrape again.
Here's the key: add the eggs one at a time, beating on low speed after each addition until just barely mixed in. Do not overbeat after adding the eggs. Over-beating incorporates too much air, which expands in the oven and then collapses, causing… you guessed it, cracks. Once the eggs are in, mix in the sour cream, vanilla, and salt on low speed until the batter is homogeneous. It should be thick, smooth, and glossy.
Pour the filling over the cooled crust. Tap the pan gently on the counter a few times to release any large air bubbles.
Water Bath Mastery: Your Key to a No-Crack Cheesecake
This is the step that frightens people, but it's simple and 100% worth it. A water bath (or bain-marie) creates a humid, gentle heating environment. It prevents the edges from cooking too fast and pulling away from the center, which is the primary cause of cracking. It also promotes that dreamy, even consistency from edge to center.
How to do it: Wrap the bottom and sides of your springform pan tightly with 2 layers of heavy-duty aluminum foil. This is to prevent water from seeping in. Place the foil-wrapped pan into a large roasting pan. Pour the cheesecake batter in. Then, place the roasting pan on your oven rack and pour hot water into the roasting pan until it comes about halfway up the sides of the springform pan. Carefully slide the rack in.
Bake at 325°F for about 1 hour and 15 minutes to 1 hour and 30 minutes. The cheesecake is done when the edges are set but the center still has a slight jiggle—like Jell-O—when you gently shake the pan. The center will firm up as it cools. If the center looks completely solid, it's overbaked and will be dry.
The Crucial Cooling & Storage Phase
Your job isn't over when the oven timer goes off. How you cool the cheesecake is just as important as how you bake it.
Turn off the oven. Crack the oven door open with a wooden spoon, and let the cheesecake sit in the cooling oven for 1 hour. This gradual temperature drop prevents thermal shock (another major crack culprit).
After that hour, carefully remove the roasting pan from the oven. Take the springform pan out of the water bath, remove the foil, and place it on a wire rack to cool completely at room temperature. This will take another 2-3 hours.
Then, and only then, cover it loosely and refrigerate it for at least 8 hours, ideally overnight. This long chill is non-negotiable. It allows the flavors to meld and the texture to fully set into that perfect, sliceable density. Trying to cut a cheesecake that's only been chilled for a couple of hours is a messy, disappointing mistake.
Your Baked Cheesecake Questions, Answered
Why did my cheesecake puff up like a soufflé in the oven and then sink and crack?
That's a classic sign of over-mixing after the eggs were added. You incorporated too much air. Remember, mix on low speed and only until each egg is just combined. Also, avoid opening the oven door during the first hour of baking—the sudden rush of cold air can cause a collapse.
Can I use low-fat or Neufchâtel cream cheese to make it lighter?
You can, but you shouldn't expect the same results. The lower fat and higher moisture content will give you a softer, less stable, and sometimes slightly grainy texture. It won't slice as cleanly. For a special occasion cheesecake, full-fat is the way to go. Consider having a smaller slice if you're watching calories.
My springform pan leaks, even with foil. How do I do a water bath?
This is a common frustration. Skip wrapping the pan. Instead, place your springform pan on a higher rack. On the rack below it, place a separate baking dish or pan filled with hot water. This creates steam in the oven, which mimics the gentle heat of a water bath. It's not quite as effective, but it's a great workaround for leaky pans.
How long does a baked cheesecake last, and can I freeze it?
Properly stored in the fridge, it's fantastic for up to 5 days. For longer storage, freezing is excellent. Cool and chill it completely, then wrap the whole cheesecake (or individual slices) tightly in plastic wrap and then aluminum foil. Freeze for up to 2 months. Thaw overnight in the refrigerator before serving.
The top of my cheesecake browned more than I wanted. How do I prevent that?
Ovens have hot spots, often at the top. If you notice browning too quickly, you can loosely tent a piece of aluminum foil over the top of the cheesecake for the last 20-30 minutes of baking. Also, ensure your oven temperature is accurate with an oven thermometer—an oven that runs hot will cause excessive browning.
There you have it. A baked cheesecake recipe that treats you like an intelligent cook, not just a recipe follower. It requires patience and attention to detail, but the reward—a tall, creamy, crack-free slice of pure indulgence—is absolutely worth it. Trust the process, respect the ingredients, and don't rush the cooling. Your perfect cheesecake is waiting.

Leave a Comment