I remember the first time I had to bake a cake for a child's birthday party where multiple allergies were on the guest list. Dairy, nuts, maybe eggs. The pressure was real. A dry, crumbly, or flavorless cake wasn't an option. After years of trial, error, and more than a few failed batches, I've landed on a formula that works every single time. This isn't just about substituting ingredients; it's about understanding why those ingredients work to create a cake that's moist, rich, and so good nobody misses the allergens.
Your Quick Guide to Dairy and Nut Free Cake Success
- Why This Dairy & Nut Free Recipe Actually Works
- The Non-Negotiable Ingredient Swaps & Why
- Step-by-Step: The Perfect Allergy-Friendly Chocolate Cake
- The 3 Biggest Mistakes Everyone Makes (And How to Avoid Them)
- How to Make This Cake Ahead of Time for a Stress-Free Party
- Your Dairy & Nut Free Baking Questions, Answered
Why This Dairy & Nut Free Recipe Actually Works
Most allergy-friendly recipes fail because they treat it like a subtraction game. Remove butter, remove milk, remove eggs. What you're left with is often a sad, structural mess. The key is to think in terms of function replacement. Butter adds fat and flavor. Milk adds liquid and aids browning. Eggs provide structure, lift, and moisture.
This recipe uses a combination of neutral oil (for reliable moisture), vinegar + baking soda (for a powerful, chemical rise that doesn't rely on eggs), and hot coffee or water (to bloom the cocoa and create an incredibly tender crumb). The result is a cake that's arguably more moist and consistent than many traditional recipes. It's a one-bowl wonder, too.
The Non-Negotiable Ingredient Swaps & Why
Let's break down the essentials. You can't just grab any product off the shelf and hope for the best. Cross-contamination is a real concern for severe allergies. Always check labels, even on products you've bought before—recipes change.
The Core Swap List
Dairy Milk: Unsweetened soy milk or oat milk are my top choices. Soy has a protein content similar to dairy, which helps with browning and structure. Oat milk adds a slight sweetness and creaminess. Avoid sweetened or flavored varieties. Almond milk is NOT an option here due to the nut-free requirement.
Butter: A neutral-flavored vegetable oil like canola, sunflower, or even a light olive oil. Oil creates a moister crumb than solid fat replacers (like margarine) because it's liquid at room temperature, keeping the cake soft for days.
Eggs: For this specific chocolate cake, we use the "chemical leavening" method (vinegar + baking soda). For other cakes, like vanilla, a flax egg (1 tbsp ground flaxseed + 3 tbsp water, rested) works well for binding, but it won't provide as much lift.
| Ingredient | Allergy-Friendly Swap | Key Function & Pro Tip |
|---|---|---|
| All-Purpose Flour | Use a trusted brand that labels "processed in a facility free of nuts/dairy" if needed. For gluten-free, use a 1:1 GF blend with xanthan gum. | Provides structure. For a lighter cake, sift it. Don't skip this if your flour is clumpy. |
| Cocoa Powder | 100% pure cocoa powder (like Hershey's Natural, Ghirardelli). Dutch-process works too, but it may react differently with baking soda. | Use natural for a sharper chocolate flavor. Blend it with the hot liquid to eliminate grittiness. |
| Vinegar | White vinegar or apple cider vinegar. | Activates the baking soda for rise. You won't taste it. It's the secret to an egg-free lift. |
Critical Safety Check: Always verify your baking powder is aluminum-free and corn-free if those are concerns. Some brands use cornstarch as an anti-caking agent. Also, pure vanilla extract is fine, but check imitation vanilla—it can sometimes contain dairy-derived compounds.
Step-by-Step: The Perfect Allergy-Friendly Chocolate Cake
This is my go-to, never-fail chocolate cake. It's dark, moist, and holds up to stacking for a birthday cake.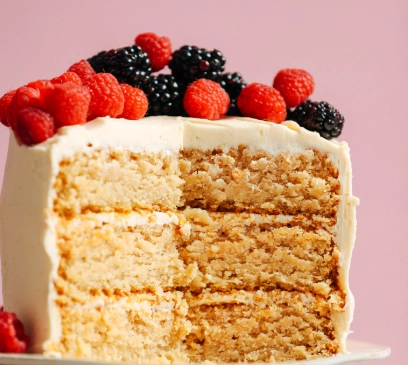
Ingredients You'll Need
- 1 ½ cups (190g) all-purpose flour
- 1 cup (200g) granulated sugar
- ¾ cup (75g) natural cocoa powder (not Dutch-process)
- 1 ½ tsp baking soda
- ¾ tsp salt
- ¾ cup (180ml) unsweetened soy milk (room temp)
- ¾ cup (180ml) hot water or hot brewed coffee (coffee intensifies chocolate flavor)
- ½ cup (120ml) neutral vegetable oil (like canola)
- 2 tsp pure vanilla extract
- 1 tbsp white vinegar
The Method (It's Shockingly Easy)
1. Prep and Preheat. Preheat your oven to 350°F (175°C). Grease and line an 8-inch round cake pan with parchment paper. Don't just grease—the parchment is insurance.
2. The Dry Whisk. In a large bowl, whisk the flour, sugar, cocoa powder, baking soda, and salt. Get out all the lumps. I mean it. A few seconds of vigorous whisking here makes a smoother batter.
3. The Wet Mix. Make a well in the center. Pour in the soy milk, oil, and vanilla. Start mixing with a spatula—it will look thick and fudgy. That's okay.
4. The Magic Step. Now, pour in the hot water (or coffee) and mix until just combined. The batter will be very thin. This is correct. Don't panic. Thin batter = tender cake.
5. The Final Act. Right before pouring, add the tablespoon of vinegar and stir quickly for about 5 seconds. You'll see it start to fizz. Immediately pour the batter into your prepared pan.
6. Bake. 30-35 minutes. The cake is done when a toothpick inserted in the center comes out with a few moist crumbs, not wet batter. Don't overbake—it continues to cook from residual heat.
7. Cool. Let it cool in the pan for 10 minutes, then turn it out onto a wire rack to cool completely before frosting. Impatience here leads to crumbly frosting disasters.
Dairy & Nut Free Frosting Idea
My favorite is a simple "buttercream" made with vegetable shortening (like Spectrum brand, which is non-hydrogenated) or a dairy-free butter stick (like Earth Balance). Whip 1 cup of shortening/butter until fluffy, then gradually add 3 cups of powdered sugar (sifted!), 1 tsp vanilla, and 2-3 tbsp of soy milk until spreadable. For a chocolate version, add ½ cup of sifted cocoa powder and an extra splash of milk.
The 3 Biggest Mistakes Everyone Makes (And How to Avoid Them)
I've seen these over and over, and they're easy to fix.
Mistake 1: Over-mixing after adding the flour. Once the wet and dry ingredients combine, gluten starts to develop. Mix just until you no longer see dry flour streaks. A few small lumps are fine. Over-mixing = tough, dense cake.
Mistake 2: Using cold liquid. The hot water/coffee is non-negotiable. It "blooms" the cocoa powder, releasing its full flavor, and it helps create that loose batter that bakes up so tender. Cold milk won't do the same thing.
Mistake 3: Not trusting the process (and opening the oven door). That thin batter looks wrong. The lack of eggs feels wrong. Resist the urge to open the oven door in the first 25 minutes. The sudden temperature drop can cause the center to collapse. Set a timer and walk away.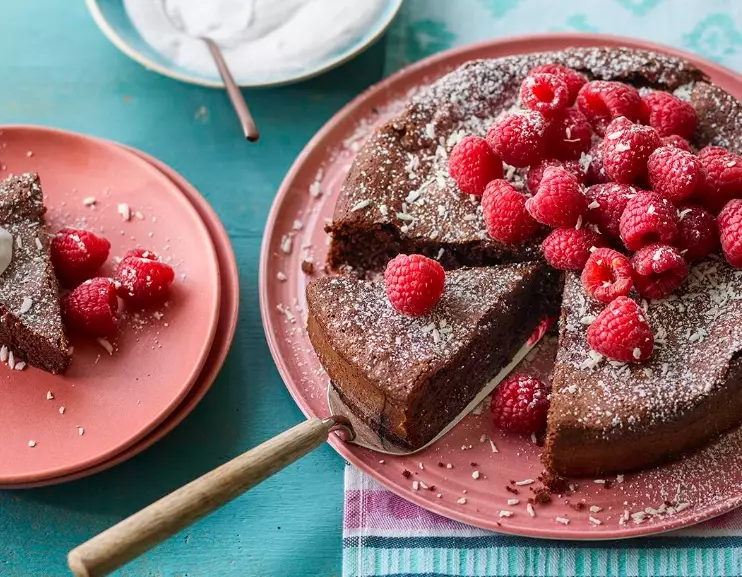
How to Make This Cake Ahead of Time for a Stress-Free Party
This cake's moisture makes it perfect for advance prep.
- Bake the layers 1-2 days ahead. Cool completely, wrap tightly in plastic wrap (I do two layers), and store at room temperature. The wrap traps steam and keeps it moist. Frosting day is a breeze.
- Freeze for up to a month. Wrap the cooled, unfrosted layers in plastic wrap, then in foil. Thaw overnight in the fridge, then bring to room temperature before frosting.
- Frosted cake holds well in a cool place for a day. For longer, refrigerate but bring to room temp before serving for the best texture and flavor.


Leave a Comment