Let's be honest. Your first attempt at decorating sugar cookies probably didn't look like the Pinterest photos. Mine sure didn't. I ended up with icing that was either a soupy mess that ran off the edges or a concrete-like paste that broke my piping tip. Sound familiar? Decorating sugar cookies is equal parts art and science, and nailing the techniques is what separates a frustrating afternoon from creating edible masterpieces. Whether you're prepping for a holiday, a birthday, or just a fun weekend project, mastering a few core sugar cookie decorating techniques will change everything.
In This Article You'll Discover...
The Non-Negotiable Foundation: Cookie & Icing Prep
You can't build a beautiful house on a crumbling foundation. The same goes for cookies. A perfectly decorated cookie starts long before the icing bag comes out.
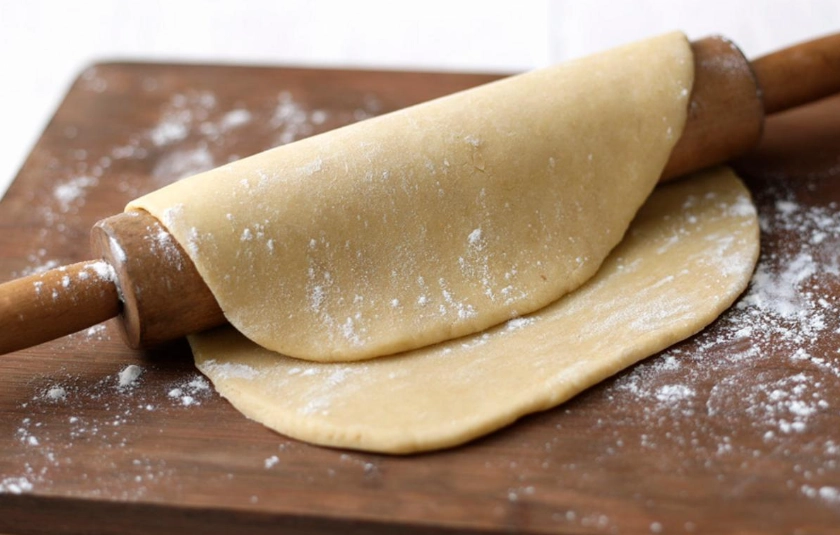
First, the cookie itself. Use a recipe specifically designed for cutting and decorating. These recipes have less spread, so your shapes stay sharp. I learned this the hard way when my carefully cut snowmen baked into amorphous blobs. Let the dough chill thoroughly—overnight is best. Roll it out evenly; an uneven cookie bakes unevenly, creating valleys and peaks that make flooding a nightmare.
After baking, let the cookies cool completely. I mean stone-cold. Decorating a slightly warm cookie is the quickest way to see your icing melt, slide, and create a shiny, greasy layer. Patience is your first decorating tool.
Now, the icing. Royal icing is the gold standard for a reason. It dries rock-hard, creating a smooth, matte finish perfect for stacking and gifting. The key ingredient is meringue powder or egg whites, which provide the stable structure. The American Culinary Federation highlights the importance of food safety when working with egg-based icings, which is why many decorators prefer pasteurized meringue powder. The flavor is clean, and it acts as a blank canvas.
How to Master Royal Icing's Three Key Consistencies
This is the heart of it. Getting the icing consistency wrong is the #1 reason decorations fail. Think of your icing in three distinct "gears," each for a different job.
| Consistency Name | Best For | Visual Test ("10-Second Rule") |
|---|---|---|
| Outline (Stiff) | Piping borders, fine details, writing, flowers. | A peak of icing should hold its shape firmly. When you drag a knife through it, the path stays clear for over 10 seconds. |
| Flood (15-Second Icing) | Filling (flooding) large areas inside an outline. | When you drag a knife through it, the path should smooth over in about 10-15 seconds. It should be the texture of thick syrup. |
| Detail (20+ Second Icing) | Creating dots, delicate lines, lacework. | The path from the knife test smooths over in 20+ seconds. It's slightly thicker than flood consistency. |
Here's the workflow: Make one big batch of stiff icing. Separate it into smaller bowls for coloring. Then, for each color, take out what you need for outlining and keep it thick. To the remaining icing in the bowl, add water literally drop by drop, mixing thoroughly after each addition, until it reaches the perfect flood consistency. Going too fast is a one-way ticket to souptown.
What If My Icing is Too Runny?
Don't panic. You have two options. Option one: let it sit uncovered for 15-20 minutes. Some water will evaporate and it will thicken slightly. Option two (the faster fix): add a tiny bit of sifted powdered sugar. But go slow—you can always add more, but you can't take it out.
The Core Duo: Flooding and Piping Techniques Demystified
What is the Flooding Technique?
Flooding is the technique of filling a large, outlined area with thinned icing to create a smooth, even base. It's simpler than it looks.
- Outline: Pipe a continuous barrier of stiff icing around the edge of your cookie. This dam holds the flood icing in.
- Flood: Immediately, using the same color in flood consistency, fill the outlined area. You can use a piping bag with a slightly larger tip, a squeeze bottle, or even a small spoon.
- Spread: Use a toothpick or a scribe tool to gently guide the icing into all the corners and pop any air bubbles that rise to the surface.
The goal is to get the flood icing to settle just to the top of the outline. If it's too low, add a little more. If it's overflowing, you've used too much. It takes a cookie or two to get the feel for the right amount.
Piping Like a Pro
Piping is all about control. Use a bag that feels good in your hand—I prefer disposable bags for easy cleanup. Hold the bag like a pencil, with your guiding hand near the tip for stability. Apply steady, even pressure and let the icing flow; don't push or jerk.
For outlines, keep the tip slightly above the cookie surface. Touch down to start, lift as you pipe the line, and touch down to stop. This prevents little tails and bumps. Practice on parchment paper first if you're nervous.
Next-Level Tricks: Wet-on-Wet, Painting, and Embossing
Once you're comfortable with flooding and piping, these techniques will make your cookies look professionally designed.
Wet-on-Wet: This is my favorite for quick, stunning effects. Pipe your outline and flood the base color. Then, while the flood icing is still wet, add dots, lines, or shapes with a contrasting color of flood icing. The colors will blend softly where they meet. You can create marbling, simple flowers, or hearts. The timing is key—the base must be wet enough to accept the new color but not so wet that everything dissolves into a muddy puddle.
Painting & Detail Work: After the flooded base has dried completely (give it at least 4-6 hours, overnight is safer), you can paint on it. Use food-grade brushes and gel food coloring diluted with a drop of vodka or clear extract (the alcohol evaporates quickly). You can also use edible dusts mixed with a drop of lemon extract. This is how you get intricate faces, landscapes, or shading.
Embossing & Texture: Press stamps or textured mats into the wet flood icing for a patterned effect. You can also use the end of a paintbrush to create indentations for eyes or buttons before the icing sets.
The Real Deal on Tools and Materials
You don't need a professional kitchen, but a few key tools make a world of difference.
- Piping Tips: PME tips #1, #1.5, #2, and #3 will cover 95% of your needs. A #1 is for super fine lines, #2 is the standard workhorse for outlines, and a #3 or #4 is great for flooding.
- Piping Bags: Disposable bags are cheap and eliminate cleanup. If you use reusable ones, get a good coupler system so you can change tips easily.
- Scribe Tool / Toothpicks: Essential for guiding icing and popping bubbles.
- Gel Food Coloring: Liquid coloring waters down your icing. Gel pastes (like AmeriColor or Chefmaster) provide vibrant color without changing consistency.
- Turn Table: A small, cheap plastic turntable makes outlining and decorating round cookies infinitely easier.
Don't feel you need to buy everything at once. Start with a #2 tip, some bags, and one set of primary gel colors. You can mix any color you need from those.


Leave a Comment