So you want to decorate cookies. You've seen those perfect, glossy, intricately designed cookies online and thought, "I could never do that." Let me stop you right there. You can. The "best" way isn't one secret trick; it's about matching the right technique to your skill level, the occasion, and honestly, how much time you have. After years of more failed batches than I care to admit, I've learned that stunning cookies come from understanding a few core methods and avoiding the tiny mistakes that ruin hours of work.
For me, the best way to decorate cookies combines reliability with creativity. It means your icing dries smooth, your colors stay vibrant, and you finish the project feeling proud, not frustrated. We'll break down the three pillars of great cookie decor: royal icing for precision, edible paints and dusts for artistry, and sprinkles & sugars for effortless charm.
Your Quick Guide to Cookie Decorating Success
Gathering Your Cookie Decorating Arsenal
You don't need a professional kitchen, but having the right few tools makes all the difference. Trying to pipe fine lines with a ziplock bag corner is a recipe for frustration. Here’s what you actually need, categorized by priority.
| Tool | Why You Need It | Budget-Friendly Alternative |
|---|---|---|
| Piping Bags (Disposable) | Control. Reusable bags are hard to clean and often burst. Disposables let you switch colors fast. | Heavy-duty freezer bags. Snip a very small corner. |
| Piping Tips (PME #1.5, #2, #3) | A #2 tip is the workhorse for outlines and details. #1.5 for super fine lines, #3 for filling. | Start with just a #2. You can do 90% of designs with it. |
| Couplers | Lets you change tips on the same bag of icing without emptying it. A huge time-saver. | Skip if on a tight budget, but prepare for mess. |
| Food Coloring Gels (Not Liquid!) | Gels (like AmeriColor or Wilton) add vibrant color without thinning your icing. Liquid dyes water it down. | Start with primary colors (red, blue, yellow, black, white) to mix any shade. |
| Scribe Tool or Toothpicks | For popping air bubbles in flooded icing and nudging icing into corners. Essential for a smooth finish. | A box of toothpicks. They work perfectly. |
| Small Offset Spatula | For spreading icing or buttercream smoothly if you're not piping. More control than a knife. | A butter knife, but it's clunkier. |
I made the mistake early on of buying a massive 50-tip set. Most sat unused. Invest in quality for the core items—good bags and a couple of tips—and improvise the rest.
Royal Icing: The Gold Standard for Detail
If you want those sharp lines, smooth backgrounds, and dimensional details, royal icing is your friend. It dries rock hard, which is great for packaging but intimidating for beginners. The secret? It's all about consistency.
Getting the Consistency Just Right
This is where 90% of beginners fail. Royal icing needs to be different thicknesses for different jobs. The "10-second icing" rule is a good start: drag a knife through your icing; the line should disappear in about 10 seconds. But here's the nuance most tutorials miss:
Outline Consistency (Stiff): This should hold a sharp peak. It's for drawing the walls that will contain the flood icing. Too runny, and your outlines will collapse.
Flood Consistency (15-20 second): Thinner. When you drop a spoonful back into the bowl, it should melt back in smoothly within 15-20 seconds. Add water drop by drop. I've ruined a whole batch by adding half a teaspoon at once.
The Piping and Flooding Process, Step-by-Step
1. Outline: Pipe a continuous line around the edge of your cookie. Connect the end to the start. This is your dam.
2. Flood: Immediately, use a thinner consistency to fill the area. Don't overfill; just drop some in and spread gently with a toothpick or scribe tool.
3. Pop Bubbles: Tap the cookie gently on the counter and use your toothpick to pop any air bubbles. This prevents craters.
4. Dry Time: Let the flood layer dry completely (4-8 hours, even overnight) before adding details on top. If you don't, the colors will bleed.
The most satisfying part? Watching that glossy, liquid icing settle into a perfectly smooth, matte surface.
Edible Paints & Dusts: For the Artist at Heart
Maybe piping isn't your thing. That's where edible paints come in. They let you paint directly onto a dry cookie base (iced with royal icing or even just a smooth buttercream) for watercolor effects, fine details, and shading that's impossible with icing alone.
Edible Dusts (Luster/Peal Dust): Mix with a clear extract (like vodka or lemon extract) to create paint. The alcohol evaporates quickly, leaving just the color. Vodka is my go-to because it's flavorless. This is perfect for metallic accents, blush on Santa's cheeks, or shading petals.
Food Coloring Paint: Thin your gel food colors with a tiny bit of water or extract. Use a fine paintbrush. This is how you get intricate faces, lettering, or landscapes.
I once tried to paint on icing that was "mostly" dry. The colors ran together into a brownish mess. Patience is non-negotiable here.
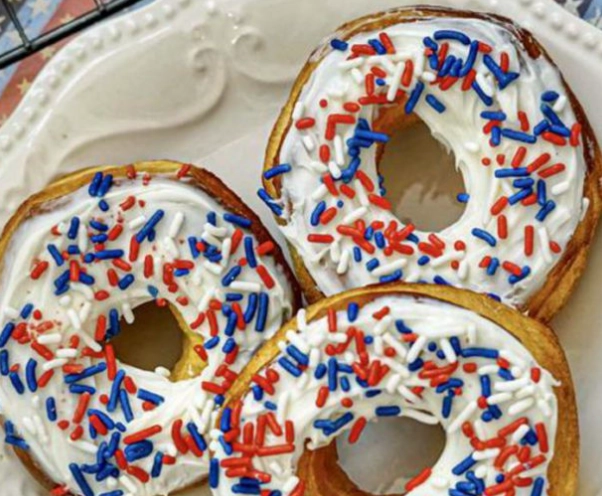
The Smart Sprinkler's Strategy
Don't underestimate the power of sprinkles. They add instant texture, color, and fun with minimal effort. The key is timing.
The Adhesive: You need a "wet" base for sprinkles to stick. This can be a thin layer of royal icing (flood consistency), a dab of honey or corn syrup, or even just the cookie dough itself if you brush it with an egg wash before baking.
The Technique: Pour sprinkles over the wet area, press gently, then tip off the excess. Do this over a bowl to catch the fallout. For precise placement (like just the edges), hold the cookie over your bowl and use your fingers to sprinkle.
For sanding sugars, press the cookie face-down into a shallow plate of sugar. This gives you an even, professional coating.
Pro Moves & Common Pitfalls
Here are the subtle things that separate good cookies from great ones.
Color Bleeding: This happens when you add wet details on top of icing that isn't 100% dry. The moisture reactivates the base layer. The fix? Dry time. Or, use dusts for details on a dry base.
Cratered Icing: Those little holes come from air bubbles you didn't pop. Tap and poke diligently.
Icing Too Thin/Runny: You added too much water. There's almost no coming back from this. Start over or use it as a glue for sprinkles. This is why you thin slowly.
The "One Icing to Rule Them All" Fallacy: You can't use the same icing for outlining and flooding. It won't work well for either job. Take the 2 minutes to prepare two consistencies.
My personal rule? Bake and cool cookies one day. Decorate the next. Rushing leads to mistakes.
Your Cookie Decorating Questions, Answered
Why does my royal icing always end up too runny or too thick?
How long do decorated cookies with royal icing last, and how should I store them?
Can I use buttercream instead of royal icing to decorate?

My icing colors look dull. How do I get vibrant, deep colors?
What's the fastest way to decorate a large batch of cookies for a party?

Leave a Comment