Quick Navigation
- The Foundation: Getting Your Icing Right
- Core Cookie Decorating Techniques, From Basic to Brilliant
- Troubleshooting Common Cookie Decorating Disasters
- Taking It Further: Advanced Effects & Finishes
- Answers to Your Burning Cookie Decorating Questions
- Gathering Your Toolkit: What You Really Need
- The Mindset of a Cookie Decorator
Let's be honest, we've all been there. Scrolling through Instagram or Pinterest, seeing these impossibly perfect, intricately decorated cookies and thinking, "I could never do that." The tiny flowers, the flawless lettering, the designs that look more like paintings than food. It feels like a secret club, and you don't have the password. Well, I'm here to tell you that password is just a few basic cookie decorating techniques. It's not magic, though it feels like it when you get it right. It's a learnable skill, a mix of understanding your materials and practicing some simple hand movements. I remember my first batch of decorated cookies. The icing was too runny, the colors bled, and my Santa looked more like a confused pink blob. It was a mess. But that's how you learn. This guide is the one I wish I had when I started, pulling back the curtain on all those cookie decorating techniques that seem so mysterious.
The Golden Rule: Your cookie is your canvas, but your icing is your paint. Getting the icing right is 80% of the battle in cookie decoration.
The Foundation: Getting Your Icing Right
Before you even pick up a piping bag, you need to understand your medium. For most decorated cookies, you're talking about royal icing. It's a simple mix of powdered sugar, meringue powder (or egg whites), and water. Its magic lies in its ability to dry rock hard, giving you a smooth, stable surface. But here's the kicker – it's all about consistency. This one concept will make or break your entire project.
Icing consistency isn't just "thick" or "thin." Bakers talk about it in terms of "stiff," "piping," "flood," and "outline" consistency. It's a bit fussy, but once you get the feel for it, it becomes second nature.
Royal Icing Consistencies Demystified
Getting the right thickness is the single most important skill. Here’s a breakdown that finally made sense to me.
| Consistency Name | Texture & "Test" | Primary Use | Common Pitfall |
|---|---|---|---|
| Stiff Peak | Holds a sharp peak when you lift the spatula. Doesn't settle back. | Making icing flowers, figure piping, detailed 3D work. | Too thick to pipe smoothly; can tear your cookie. |
| Piping / Outline | Like soft toothpaste. A peak will form and then gently curl over after 5-10 seconds. | Outlining shapes, writing, fine details. Your "fence" to hold flood icing. | If it's too thin, your outline will lose its shape and spread. |
| 15-Second Flood / Flow | The gold standard. A ribbon of icing drizzled back into the bowl should disappear completely in about 15 seconds. | Filling (flooding) large areas inside an outline. Creates a smooth, glass-like finish. | Too thick and it won't self-level, leaving ridges. Too thin and it will overflow your outline. |
| 20+ Second Flow | Takes 20+ seconds to disappear. Thicker than standard flood. | Creating texture (like fur), wet-on-wet techniques where you want less blending. | Can dry with a matte finish if over-thickened. |
My personal nemesis was the 15-second flood. I'd add water, stir, test... nope. Add more, stir, test... oops, now it's soup. It's frustrating. The key is to add water literally by drops once you're close. A half-teaspoon can be the difference between perfect and a runny disaster. And always, always cover your bowl with a damp cloth. Royal icing starts to crust over in minutes, and there's nothing worse than finding your perfectly mixed icing has turned into a weird sugary skin.
Core Cookie Decorating Techniques, From Basic to Brilliant
Alright, your icing is mixed, colored, and separated into bowls with different consistencies. Now for the fun part – the actual decorating techniques for cookies. Let's build up from the simplest method to the more advanced stuff.
The Outline and Flood Method (Your New Best Friend)
This is the backbone of cookie decorating. It’s a two-step process that gives you professional, clean-edged results. First, you use piping-consistency icing to draw a barrier around the edge of your cookie shape. Think of it like building a tiny dam. Let that outline set for a few minutes—it doesn't need to be bone dry, just firm enough that it won't dissolve when the wetter icing touches it. Then, you fill (flood) the inside with your 15-second consistency icing. Use a toothpick or a scribe tool to gently push the flood icing into all the corners. The beauty of this method is its control. It’s how you get those sharp, crisp lines between colors.
Is it time-consuming? Yeah, a bit. You have to wait between steps. But the result is so worth it. It’s the first major hurdle in learning cookie decorating techniques.
Wet-on-Wet Piping
This is where it starts to feel like real magic. With wet-on-wet, you pipe a design onto a base layer of flood icing while it is still wet. The new design settles into the base, creating a smooth, seamless look. It's perfect for making dots, stripes, simple shapes, and even marbled effects. The trick is timing. Your base flood needs to be wet enough to accept the new design but not so wet that the design completely sinks and loses its shape. I find a 1-2 minute wait after flooding is my sweet spot, but it depends on your kitchen's humidity.
Watch Out: If your base flood icing has started to form a skin (you'll see a slight shine change), your wet-on-wet design will sit on top and create a raised texture instead of blending in. It's not a failure, just a different effect!
Piping Techniques: It's All in the Bag and Tip
Piping is where your personal style comes out. The tool matters. I made the mistake of using cheap, flimsy bags for years. They burst. It's a sticky, colorful nightmare. Investing in good quality reusable bags or even just sturdy disposable ones is a game-changer.
The piping tip is your brush. A few essentials:
- Round Tips (like #1.5, #2, #3): Your workhorses. Used for outlining, writing, dots, and fine details. A #2 is my desert-island tip.
- Star Tips (like #16, #21): Create borders, rosettes, and textured effects. Great for making quick, pretty grass or fur.
- Leaf Tips (#65, #352): Pretty self-explanatory! Perfect for, well, leaves. Also good for certain petal shapes.
- Petal Tips (like #101, #104): For making beautiful, realistic ruffled petals for flowers. This is an advanced technique that takes practice to control the pressure and angle.
Pressure control is the secret no one talks about enough. Squeeze from the top of the bag with steady, even pressure. To stop the flow, release pressure and pull the tip away. If you just pull away while still squeezing, you'll get a ugly tail. It feels awkward at first. Your hand will cramp. It gets better.
Troubleshooting Common Cookie Decorating Disasters
Things will go wrong. It's part of the process. Here’s a quick fix-it guide for the problems that made me want to throw my cookies out the window.
| The Problem | Likely Cause | How to Fix It (or Prevent It Next Time) |
|---|---|---|
| Craters or Bubbles in dried flood icing. | Air trapped in the icing during mixing or pouring. Sometimes caused by over-mixing. | Pop bubbles with a toothpick immediately after flooding. Let your mixed icing sit for 10-15 minutes covered, then stir gently to release air. |
| Icing Bleeding (colors run into each other). | Underlying icing wasn't dry enough before adding a neighboring color. Using gel colors that are too watery. | Ensure each section is completely dry to the touch (can take hours/overnight). Use highly concentrated gel colors (like AmeriColor or Chefmaster) to avoid adding extra liquid. |
| Outline breaks when flooding. | Outline was too thin, or flood icing was too heavy and broke through the dam. | Make sure your outline icing is true "piping" consistency. Let it crust over for 5+ minutes before flooding. |
| Grainy or Matte Finish | Low-quality powdered sugar with too much cornstarch, or icing was over-mixed. | Use pure cane powdered sugar if possible. Sift your sugar! Mix icing on low speed just until combined. |
The bleeding issue drove me nuts for months. I'd let cookies dry for what felt like forever, add an accent color, and wake up to a blurry mess. Now I'm patient. I let them dry overnight. No exceptions. It saves heartache.
Taking It Further: Advanced Effects & Finishes
Once you've got the basics down, you can play. These advanced cookie decorating techniques are what make your cookies stand out.
Embossing and Stenciling
Stencils are a cheat code for complex designs. Place a food-safe plastic stencil over a flooded cookie (after the flood has set for maybe 30 minutes so it's not super wet). Hold it firmly and spread a slightly thicker icing over it with an offset spatula. Lift the stencil straight up, and you have a perfect, intricate design. It's shockingly easy and looks incredibly professional.
Painting and Dusting
After your icing is completely dry, you can use food-grade paints (like luster dust mixed with a clear alcohol like vodka or lemon extract) to add shimmer, highlights, and painterly details. Edible dusts can also be brushed on dry for a soft, matte color. This is where cookies truly become edible art. You're no longer just a decorator; you're a miniaturist painter.
Using Transfers
This is a brilliant time-saver for intricate elements. Pipe a design (like a flower, a bow, a character's face) onto a piece of parchment or acetate. Let it dry completely, usually 24 hours. Once rock hard, you can peel it off and attach it to a cookie with a dab of fresh icing. It lets you work on complex pieces in advance and assemble cookies quickly later. It's a game-changer for large batches.
My Two Cents: Don't jump into painting and stenciling day one. Get rock-solid at flooding and piping first. The fancy techniques are built on a foundation of smooth, dry icing. A beautiful painting won't save a lumpy, bubbly base.
Answers to Your Burning Cookie Decorating Questions
I get asked these questions all the time. Let's clear them up.

Gathering Your Toolkit: What You Really Need
You don't need a professional bakery's worth of gear to start. Here’s my realistic list, split by priority.
The Non-Negotiables: Mixer (stand or hand), powdered sugar, meringue powder (I prefer it over raw egg whites for safety and consistency), gel food colors, piping bags (even disposable ones), couplers (lets you change tips on one bag), a few round piping tips (#1.5, #2, #3), scribe tool or toothpicks, airtight containers for icing.
Nice-to-Haves (Worth the Investment): Good quality offset spatula, multiple tipless piping bags (these are a revelation), a turntable for easy decorating, food-safe stencils, edible paints and dusts, a dehydrator for speeding up drying time (a hack many pros use).
I started with just bags, a #2 tip, and three colors. You build your kit over time as you discover which techniques for cookie decorating you love most.
The Mindset of a Cookie Decorator
This is the most important section. Technique is mechanical. The mindset is what keeps you going.
Your first cookies will not be perfect. They might be ugly. That's okay. Compare your fifth cookie to your first, not your cookie to someone's on the internet who has been doing this for ten years. Practice really does make progress. Start with simple shapes—circles, mittens, stars. Master the flood on those before you try a detailed unicorn head.
Embrace the mess. There will be powdered sugar on your ceiling. Your fingernails will be stained blue for days. It's a sign of a good time.
And finally, remember what they are. Cookies. Sweet, edible joys. If a design fails, it still tastes good. The community of home cookie decorators is incredibly generous and supportive. Places like The Cookie Connection or even specific groups on social media platforms are filled with people sharing their fails and triumphs. For structured learning and professional standards, the Retail Bakers of America association is a cornerstone resource for many in the baking industry, though their focus is broader than just cookies.
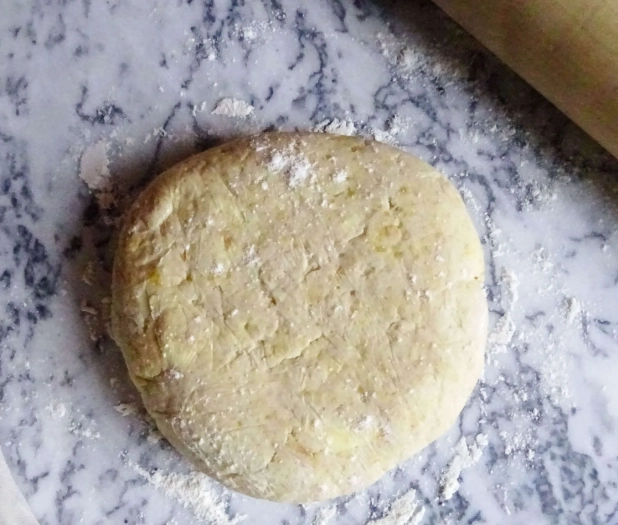
So take a deep breath, bake a simple batch of sugar cookies (let them cool completely!), and just try. Mix some icing. Try to hit that 15-second flood. Pipe an outline. Fill it in. You've just used your first real cookie decorating technique. From there, the only limit is your patience and your imagination. Now go make something deliciously beautiful.


Leave a Comment