Your Crispy Cookie Roadmap
- Why Your Cookies Aren't Crispy (The Common Pitfalls)
- The Anatomy of a Perfectly Crispy Chocolate Chip Cookie
- The Master Recipe: Step-by-Step to Crispy Perfection
- Leveling Up: Advanced Tips for Cookie Nerds
- Storing Your Masterpiece (Keeping Them Crispy!)
- Answering Your Crispy Cookie Questions (FAQ)
- The Final Word: Embrace the Process
Let's be honest. We've all been there. You follow a recipe for chocolate chip cookies, dreaming of that satisfying, audible snap, that glass-like crispness that shatters into buttery, sugary shards. Instead, you pull out a pan of soft, cakey puffs. They're tasty, sure, but they're not the crispy chocolate chip cookie recipe you were promised. It's a special kind of kitchen heartbreak.
I spent years, and I mean years, chasing that perfect crunch. My kitchen saw more failed batches than I care to admit—cookies that spread into one giant lace-like sheet, cookies that were more like hardtack, cookies that were just… sad. It felt like alchemy. But then, I started paying attention to the why behind the ingredients and steps. That changed everything.
This isn't just another recipe list. This is the culmination of all those experiments, a deep dive into the science and soul of a truly crispy cookie. If you're tired of guesswork and want reliable, repeatable results, you're in the right place. We're going to build your perfect crispy chocolate chip cookie recipe from the ground up.
The Core Truth: Crispy cookies are all about moisture control. Less moisture = more crunch. Every single decision in this recipe serves that master.
Why Your Cookies Aren't Crispy (The Common Pitfalls)
Before we fix it, let's diagnose. Here are the usual suspects that steal the crunch from your chocolate chip cookie recipe crispy dreams:
- Too Much Brown Sugar: Brown sugar contains molasses, which adds moisture and acidity. More moisture = chewier texture. It's great for a chewy cookie, but the enemy of crispness.
- An Extra Egg Yolk (or a Whole Extra Egg): Egg yolks are loaded with fat and emulsifiers, leading to a tender, cake-like crumb. We want structure, not tenderness.
- Under-creaming the Butter and Sugar: This step isn't just about mixing; it's about incorporating air. Less air means a denser, sometimes greasier cookie that doesn't set up as crisp.
- Baking at Too Low a Temperature: A lower temp gives the dough more time to spread before setting, often resulting in a thin but sometimes leathery cookie, not a light crisp one.
- Using a Thick, Doughy Recipe: Some recipes are designed for height and softness. Starting with the wrong blueprint is a battle you can't win.
See a pattern? Moisture, fat, and structure. Now, let's flip the script.
The Anatomy of a Perfectly Crispy Chocolate Chip Cookie
Think of your cookie dough as a construction project. Every ingredient is a building material with a specific job. For a crispy cookie recipe, we need specific materials.
The Non-Negotiable Ingredients & Their Roles
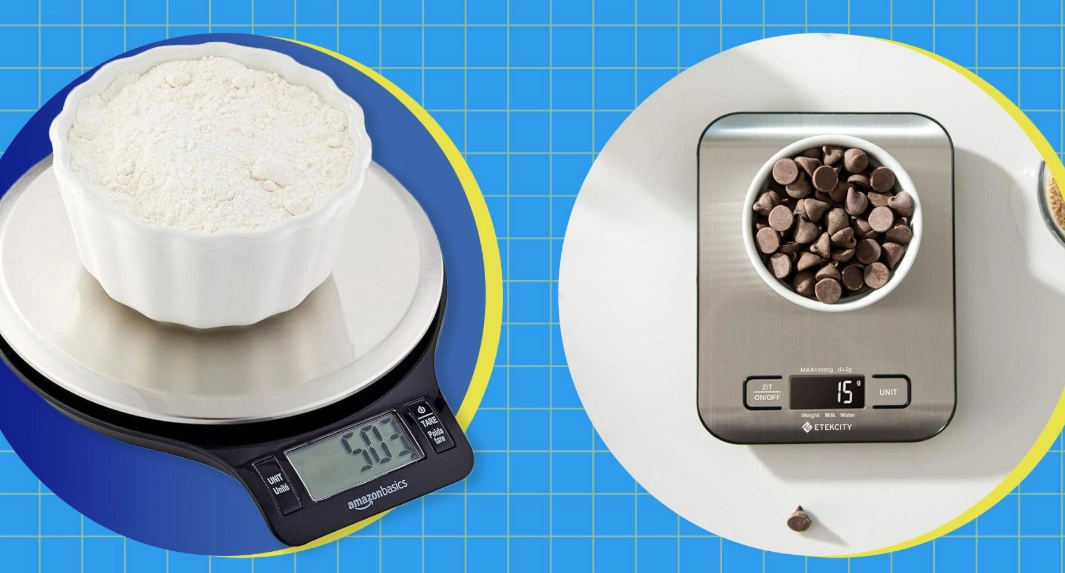
Here’s what you absolutely need and why. Don't just measure—understand.
| Ingredient | Role in a Crispy Cookie | What to Avoid/Use |
|---|---|---|
| Flour | Provides structure. The gluten network sets the shape. | Use all-purpose. Bread flour has more protein (chewier), cake flour has less (too tender). |
| Butter | Adds flavor and, when melted, encourages spread for thinness. | Use melted and cooled butter. It hydrates the flour more, reducing gluten development (less chew) and promoting spread. |
| Sugar | Sweetens, tenderizes, and—crucially—caramelizes for crisp edges. | Dominantly use white granulated sugar. It draws moisture out during baking, aiding crispness. A tiny bit of brown sugar is okay for flavor depth only. |
| Egg | Binds ingredients and adds moisture. | Use ONE large egg white only. The yolk adds fat/softness we don't need. The white provides binding without excess fat. This is a game-changer. |
| Leavener | Creatives air pockets for texture. | Baking soda is typical. Ensure it's fresh! Old baking soda won't make cookies spread properly. |
| Salt & Vanilla | Flavor enhancers. Salt balances sweetness and heightens other flavors. | Don't skip. Use pure vanilla extract and fine sea salt for best results. |
| Chocolate | The star! Melts into pockets of flavor. | Use chopped chocolate bars or high-quality chips. The size of the chunks affects texture distribution. |
That egg white trick? It felt weird the first time I tried it. I was convinced it would be a disaster. But the difference in final texture was night and day—lighter, crisper, without being dry.
The Master Recipe: Step-by-Step to Crispy Perfection
Alright, let's bake. Follow these steps precisely. This is the exact chocolate chip cookie recipe for crispy results I use every time now.
Ingredients List
- 2 ¼ cups (280g) all-purpose flour (spooned and leveled)
- 1 teaspoon baking soda
- 1 teaspoon fine sea salt
- 1 cup (2 sticks / 226g) unsalted butter, melted and cooled slightly
- 1 ½ cups (300g) granulated white sugar
- 2 tablespoons (25g) light brown sugar (packed, for hint of flavor)
- 1 large egg white (save the yolk for custard!)
- 2 teaspoons pure vanilla extract
- 2 cups (340g) semi-sweet chocolate chips or chopped chocolate
The Process (Where Magic Happens)
1. Prep is Key: Preheat your oven to 375°F (190°C). Line your baking sheets with parchment paper. Not wax paper. Parchment. Trust me on this. It ensures even browning and easy removal.
2. Whisk the Dry Team: In a medium bowl, whisk together the flour, baking soda, and salt. This isn't just mixing; it's evenly distributing your leavener so every cookie rises the same. I've gotten lazy here before and ended up with weird, uneven cookies. Don't be like past me.
3. The Butter-Sugar Foundation: In a large bowl, combine the melted (but not hot!) butter, white sugar, and brown sugar. Stir vigorously with a wooden spoon or spatula for a full minute. You're not just mixing; you're dissolving the sugar into the butter, creating the base for caramelization. It should look like a glossy, thick paste.
4. Incorporate the Wet: Beat in the single egg white and vanilla extract until the mixture is smooth. It might look a little separated at first—that's fine. Keep stirring until it comes together.
5. Bring It All Together: Add the dry ingredients to the wet. Fold gently until just a few streaks of flour remain. Then, add your chocolate chips/chunks and fold until everything is incorporated. The dough will be soft, almost like a thick brownie batter. This is correct for a crispy chocolate chip cookie recipe.
6. Portioning for Perfection: Use a cookie scoop (about 1.5 tablespoons) or two spoons to drop rounded balls of dough onto your prepared sheets. Space them at least 3 inches apart. They will spread. Giving them room is non-negotiable unless you want a cookie slab (which, sometimes, isn't the worst thing).
7. The Bake: Bake for 10-12 minutes. You're looking for the edges to be a deep, golden brown, and the centers to look just set. The cookies will look puffy when you first take them out—that's okay.
8. The Critical Rest: This is vital. Let the cookies cool on the baking sheet for 5 minutes. They will deflate slightly and the centers will crisp up as they cool. Then, transfer them to a wire rack to cool completely. I know it's torture, but eating one too early gives you a false impression—they need to fully set to achieve their ultimate crisp texture.
Pro Tip from a Past Failure: If your first batch spreads too much or not enough, don't panic. Dough temperature is a factor. If they spread like crazy, chill the dough for 20 minutes before baking the next batch. If they didn't spread enough, your dough might be too cold or your baking soda old. Troubleshooting is part of the journey!
Leveling Up: Advanced Tips for Cookie Nerds
You've got the basic recipe for crispy chocolate chip cookies down. Now, let's tweak and perfect.
Texture Customization
Want them even thinner and lacier? Replace 2 tablespoons of flour with an equal amount of cornstarch. It inhibits gluten formation, promoting tenderness and spread.
Prefer a more toffee-like, crisp-throughout cookie? Let the shaped dough balls rest, uncovered, in the fridge for 24-48 hours. This allows the flour to fully hydrate and the sugars to slightly caramelize in the dough, leading to a deeper flavor and more uniform crispness. The wait is hard, but the payoff is real.
The Chocolate Variable
Chocolate choice matters more than you think. I did a side-by-side test once.
- Standard Chocolate Chips: Hold their shape well, give a classic look.
- Chopped Chocolate Bars: Create irregular pools and shards of chocolate. This is my personal favorite for a crispy chocolate chip cookie because you get varying textures in each bite.
- Milk Chocolate vs. Dark: Milk chocolate is sweeter and softens the cookie slightly where it melts. Dark chocolate (70%) provides a bitter contrast that makes the crispy cookie base taste even sweeter and more buttery.
Don't be afraid to mix and match. A blend of semi-sweet chips and chopped milk chocolate bar? Divine.
Storing Your Masterpiece (Keeping Them Crispy!)
So you've baked the perfect batch. How do you keep them from going soft? The enemy, as always, is ambient moisture.
At Room Temperature: Once completely cool, store them in an airtight container. I like a cookie tin or a glass container with a rubber seal. A piece of bread in the container is an old trick to keep soft cookies soft—so do NOT do that here! You want a dry environment. They'll stay crisp for 4-5 days this way.
Freezing for Later: These cookies freeze beautifully. Place cooled cookies in a single layer in a freezer bag, squeeze out all the air, and seal. They'll keep for up to 3 months. Thaw at room temperature for 15 minutes, or pop them in a 350°F oven for 3 minutes to refresh the crispness. You can also freeze the shaped dough balls and bake from frozen, adding 1-2 minutes to the bake time.
Answering Your Crispy Cookie Questions (FAQ)
The Final Word: Embrace the Process
Baking the ultimate crispy chocolate chip cookie recipe is part science, part art, and wholly satisfying. It took me many tries to move from frustration to understanding. Don't get discouraged if your first batch isn't perfect. Note what happened, adjust one variable at a time (sugar ratio, butter temp, bake time), and try again.
The beauty of this recipe is its reliability. Once you understand the principles—less moisture, more white sugar, melted butter, the egg white trick—you own it. You can start to make it yours. Add some toasted pecans? Swap in some toffee bits? Go for it.
Now, you have all the tools. No more mystery, no more kitchen guesswork. Just clear, actionable steps to that perfect, shattering, buttery crisp. Go preheat that oven. Your perfect batch of crispy chocolate chip cookies is waiting.

Leave a Comment