What You'll Learn in This Guide
I still remember my first home cake decorating attempt. It was for my niece's birthday, and I had grand visions of a smooth, pastel frosting with perfect rosettes. Instead, the cake looked like it survived a food fight—lumpy frosting, colors that bled into a muddy brown, and piping that resembled abstract art more than flowers. But here's the thing: I learned from every mistake, and now I can whip up a decent-looking cake in under an hour. You can too. Decorating a cake at home doesn't require a culinary degree or expensive gear. It's about knowing a few simple tricks and avoiding the pitfalls that trip up most beginners.
Let's cut through the fluff. This guide is for anyone who's ever stared at a beautifully decorated cake and thought, "I could never do that." You can. We'll cover everything from essential tools to step-by-step techniques, all tailored for easy home execution. I've baked and decorated dozens of cakes over the years, and I'll share the insights that actually matter—not just the generic advice you find everywhere.
Must-Have Tools for Home Cake Decorating
You don't need a fully stocked bakery to start. In fact, buying too many tools upfront is a common mistake. Focus on these basics, and you'll handle 90% of decorating tasks.
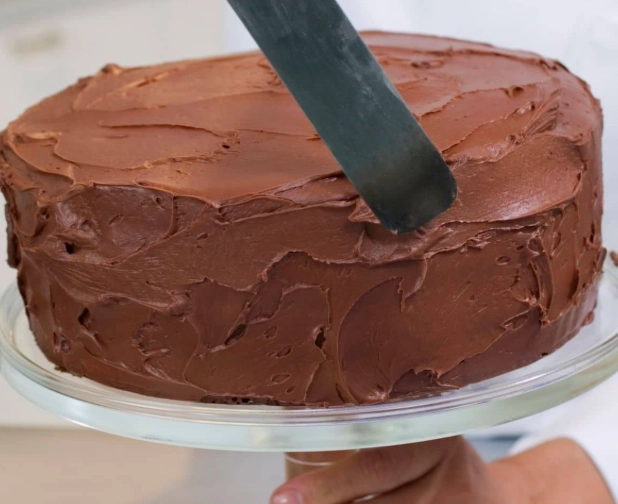
- Offset Spatula: This is non-negotiable. A small offset spatula (around 4-6 inches) lets you spread frosting smoothly without messing up the cake's surface. I bought a cheap one for $8, and it's lasted years. Without it, you'll struggle with uneven layers.
- Piping Bags and Tips: Disposable piping bags are great for beginners—less cleanup. Start with two tips: a round tip (like Wilton #12) for writing and dots, and a star tip (Wilton #1M) for swirls and borders. You can find sets under $15 on Amazon. Pro tip: if you're in a pinch, use a ziplock bag with a corner snipped off; it works for simple designs.
- Turntable: This is a game-changer. A turntable lets you rotate the cake while decorating, making it easier to apply frosting evenly. I resisted buying one for ages, thinking it was extra, but after using it, my cakes went from messy to polished. A basic plastic turntable costs around $20.
- Bench Scraper or Cardboard: For smoothing frosting, a bench scraper (or even a piece of stiff cardboard) helps create clean sides. I've used an old credit card in a pinch—it works surprisingly well.
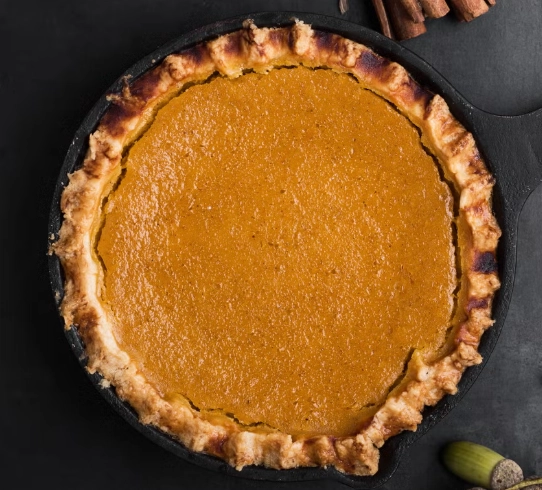
Now, what about ingredients? Stick with simple frostings like American buttercream (butter, powdered sugar, vanilla). It's forgiving and easy to color. According to King Arthur Baking, American buttercream is ideal for beginners because it holds shape well without advanced techniques. Avoid fondant at first; it's tricky and often tastes like cardboard.
Budget-Friendly Alternatives
If you're on a tight budget, here's how to improvise. Use a butter knife instead of an offset spatula—just be gentle. For piping, that ziplock bag trick I mentioned works for basic outlines. Instead of a turntable, place your cake on a plate and rotate it manually; it's slower but doable. I started with these hacks, and they saved me money while I learned.
How to Prep Your Cake Like a Pro
Preparation is 80% of the battle. Skip this, and your decorating will fail no matter how skilled you are.
First, bake your cake and let it cool completely. I mean completely—no warmth whatsoever. If the cake is even slightly warm, the frosting will melt and slide off. I learned this the hard way during a summer party; the cake looked like a melted ice cream sundae. Let it sit for at least 2 hours after baking.
Next, level the cake. Use a serrated knife to slice off the dome top so you have a flat surface. This prevents lopsided layers. Save the scraps for cake pops or just snack on them—no waste.
Then, apply a crumb coat. This is a thin layer of frosting that seals in crumbs. Spread a thin coat over the entire cake, then chill it in the fridge for 15-20 minutes. This step is crucial; it creates a smooth base for the final decoration. Many beginners skip it and end up with crumbs speckling their beautiful frosting. Don't be that person.
Finally, make sure your frosting is at the right consistency. Too stiff, and it's hard to spread; too runny, and it won't hold shape. Aim for a medium peak—when you lift the spatula, the frosting should hold a soft peak that gently curls over. If it's too thick, add a teaspoon of milk; if too thin, add more powdered sugar. Test it on a spoon before applying.
Easy Frosting Techniques You Can Master Today
Now for the fun part—actual decorating. Start with these simple techniques that look impressive but require minimal skill.
Swirls and Rosettes: Using a star tip, pipe swirls on top of the cake. Hold the bag perpendicular to the surface, squeeze, and rotate slightly as you lift. It creates a cute floral effect. Practice on parchment paper first. I messed up a few times before getting the pressure right—too hard and it blobs, too soft and it's wimpy.
Simple Borders: Pipe a border around the edge of the cake with a star tip. Just squeeze consistently as you move along. It hides imperfections and adds a finished look. For a rustic touch, use a spoon to create swoops in the frosting.
Color Blending: Want to add color? Use gel food coloring, not liquid. Liquid can make frosting runny. Add a small drop, mix, and adjust. For an ombre effect, divide frosting into bowls, color each slightly differently, and apply in layers. I tried this for a friend's baby shower, and it turned out stunning with minimal effort.
Here's a quick comparison of frostings for beginners:
- American Buttercream: Easy to make, holds shape well, sweet taste. Best for piping and spreading.
- Cream Cheese Frosting: Tasty but softer; chill it before piping to avoid sagging.
- Whipped Cream Frosting: Light and fluffy, but requires stabilization with gelatin for decorating.
Stick with American buttercream until you're comfortable. It's the most forgiving.
5 Decorating Mistakes Beginners Always Make (and How to Fix Them)
I've seen these errors repeatedly, both in my own kitchen and in online forums. Avoid them, and you'll leap ahead.
- Using Warm Frosting: If your butter is too soft, the frosting will be greasy and won't hold. Always use room-temperature butter, not melted. Fix it by chilling the frosting for 10 minutes and re-whipping.
- Skipping the Crumb Coat: As mentioned, this leads to a crumbly mess. Just do it—it takes 5 minutes and saves hours of frustration.
- Overmixing Colors: When adding food coloring, mix gently. Overmixing can incorporate air bubbles, making the frosting porous. Stir by hand instead of using a mixer for coloring.
- Piping with Stiff Frosting: If the frosting is too thick, it's hard to pipe and can tear the cake. Add a bit of milk or cream to loosen it. Test on your hand first; it should squeeze smoothly.
- Rushing the Process: Decorating takes patience. If you rush, you'll smear frosting or create uneven layers. Set aside enough time, and work in a cool room to prevent melting.
A non-consensus point: many tutorials say to refrigerate the cake after frosting. I disagree—unless it's very hot, leaving it at room temperature for an hour helps the frosting set evenly without sweating when brought out. Refrigeration can cause condensation that ruins the finish.
A Real-Life Example: Decorating a Child’s Birthday Cake
Let's walk through a concrete scenario. Say you're making a birthday cake for a 5-year-old who loves dinosaurs. Here's how to do it easily at home.
Step 1: Bake and Cool. Use a simple vanilla cake recipe. Bake it in a rectangular pan for a "dinosaur landscape" effect. Cool it overnight to be safe.
Step 2: Frosting Prep. Make a batch of American buttercream. Divide it: color most green for grass, some blue for a river, and brown for rocks. Use gel colors for vibrancy.
Step 3: Crumb Coat. Apply a thin green coat over the cake. Chill for 20 minutes.
Step 4: Decorate. Spread the final green frosting on top. Use a fork to create texture like grass. Pipe blue lines for a river with a round tip. Add brown blobs for rocks. Place toy dinosaurs on top—no need to pipe complex shapes. I did this for my nephew, and the kids loved it; the toys made it fun and easy.
Step 5: Finishing Touches. Add candy rocks or sprinkles around the edges. The whole process took about 1.5 hours, including baking time. The key is keeping it simple and playful.
This approach avoids the stress of intricate designs while still delivering a wow factor. You can adapt it for any theme—use star tips for space cakes or pastel swirls for princess parties.
Frequently Asked Questions
Decorating a cake at home is more about confidence than complexity. Start with these easy steps, practice on a small scale, and don't fear mistakes—they're part of the learning. I still have photos of my early cake disasters, and they remind me how far I've come. Grab your spatula and give it a try; you might surprise yourself with what you can create.

Leave a Comment