In This Guide
Let's be honest. We've all been there. You find a promising looking sugar cookie recipe online, spend an hour mixing and rolling, only to end up with cookies that spread into shapeless blobs, taste more like flour than sweet vanilla, or are so hard you could use them as hockey pucks. I've thrown away more failed batches than I care to admit. It's frustrating, wasteful, and honestly, a bit of a hit to the baking ego.
But here's the thing—making fantastic sugar cookies isn't magic. It's just science you can eat. Once you understand the *why* behind the steps, that classic sugar cookie recipe transforms from a mystery into a reliable friend. This guide isn't just another list of ingredients. It's the deep dive I wish I had when I started, pulling from years of trial, error, and consulting sources like the King Arthur Baking Company's cookie guide to get the fundamentals straight.
We're going to cover everything. Want a soft, pillowy cookie that melts in your mouth? Got it. Need a crisp, sturdy cut-out cookie for detailed royal icing work? We'll nail that too. Decorating disasters? We'll fix them. This is your one-stop shop to solve the sugar cookie puzzle for good.
The Foundation: Your Go-To Master Sugar Cookie Recipe
Before we tweak for texture, you need a solid, neutral base. This is my workhorse recipe. It's not too sweet, holds its shape beautifully, and has that perfect buttery, vanilla flavor that defines a great sugar cookie. The secret weapon? A combination of butter for flavor and a touch of vegetable shortening for stability. Purists might scoff, but trust me, it makes all the difference for cut-outs.
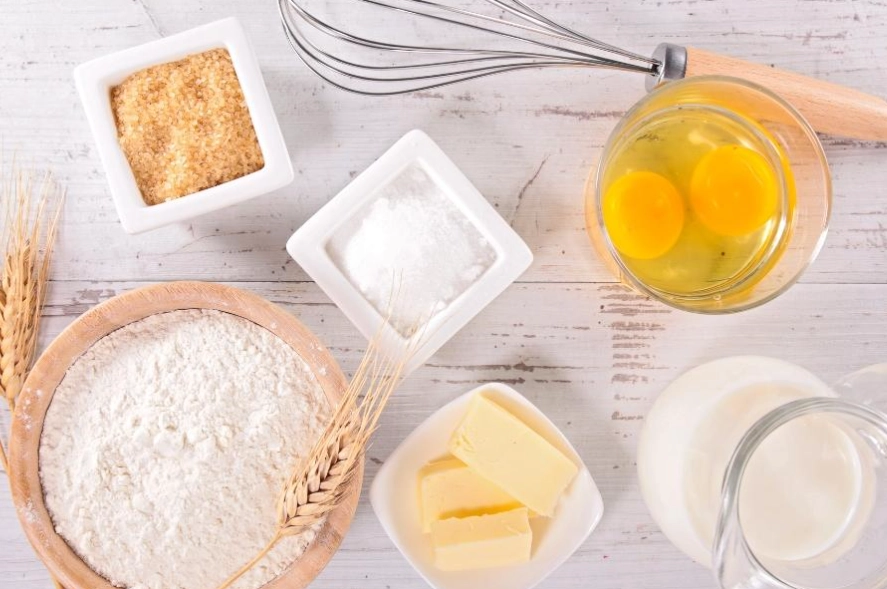
Master Recipe Ingredients:
- Unsalted Butter (1 cup / 225g): Cool, but not cold. We want it pliable but not melted. This is non-negotiable for creaming properly.
- Vegetable Shortening (¼ cup / 50g): Don't skip this! It has a higher melting point than butter, which is the key to preventing spread.
- Granulated Sugar (1 ½ cups / 300g): The star of the show. Using only white sugar gives a cleaner color and crisper edge.
- Large Egg + 1 Yolk (2 total yolks): The extra yolk adds richness and tenderness without too much lift.
- Pure Vanilla Extract (2 tsp): The good stuff. Imitation vanilla can leave a chemical aftertaste.
- All-Purpose Flour (3 ½ cups / 440g): Spoon and level it! Packing your cup is the #1 cause of dry, tough cookies.
- Baking Powder (1 ½ tsp) & Salt (½ tsp): Leavening and flavor balance. Yes, you need both.
The method matters just as much as the ingredients.
First, cream that butter, shortening, and sugar for a full 3-4 minutes. You're not just mixing; you're dissolving the sugar into the fat and incorporating tiny air bubbles that give the cookie structure. It should look pale and fluffy. Then add the eggs and vanilla, mixing just until combined.
Whisk your dry ingredients in a separate bowl—this ensures even distribution of baking powder and salt. Then, add them to the wet mix in two or three additions. Mix on low until *just* combined. Overmixing at this stage develops gluten, leading to toughness. The dough will be soft but not sticky.
See? That foundational sugar cookie recipe is straightforward. But now, let's talk about the big question everyone has...
Soft vs. Crisp: How to Control Your Cookie's Texture
This is where most recipes leave you hanging. They promise "the best" cookie but don't explain how to get the texture *you* want. The truth is, you have immense control. It all comes down to a few key factors: fat, sugar, egg, and leavener.
Think of it like a seesaw. Want softer? Tip the balance one way. Want crisper? Tip it the other.
| Goal | Key Ingredient Adjustments | Method & Baking Adjustments | Final Result |
|---|---|---|---|
| Soft & Chewy Sugar Cookies | Use more brown sugar (replace ½ cup white sugar). Add an extra egg yolk. Consider 1 tbsp of corn syrup. | UNDER-BAKE slightly. Pull them when the edges are just set but centers look puffy and soft. Let them cool on the sheet for 5 mins. | Thicker, cake-like interior that stays moist for days. Less ideal for detailed icing. |
| Crisp & Sturdy Cut-Out Cookies | Use all granulated sugar. Stick with the master recipe's fat blend (butter + shortening). | Chill dough thoroughly (overnight is best). Roll slightly thinner (~1/4"). Bake until edges are lightly golden all over. | Holds sharp shapes, perfect for stacking and decorating with royal icing or fondant. |
| Thin & Crisp/Lacy Cookies | Increase butter slightly, use all granulated sugar. A bit more baking powder can help spread. | Roll dough very thin. Space them well apart on the sheet. Bake until uniformly golden brown. | Delicate, snappy texture. Great for ice cream sandwiches or just a super crisp treat. |
My personal favorite? I lean towards the soft sugar cookies for eating plain, but when the holidays roll around, I'm all about that crisp canvas for decorating. The master recipe, when chilled properly, gives me that perfect sturdy-yet-edible base.
The Rolling and Cutting Dilemma: No-Stick Solutions
Rolling dough shouldn't be a fight. If your dough is sticking to the pin and tearing, you're likely using too much flour on your surface, which gets worked back in and dries out the cookie. Here's a better way:
Between two sheets of parchment paper. Seriously, it's a game-changer. Place your chilled dough disc between two large pieces of parchment. Roll it out. Peel off the top sheet, cut your shapes, then peel away the scraps. The dough stays cold, doesn't stick, and you use zero extra flour. Transferring to the baking sheet is easy—just slide a spatula under the cut cookie on the bottom parchment.
What about re-rolling scraps? Gather them, press (don't knead) into a disc, and chill again for 10-15 minutes before rolling. Each re-roll makes the dough a bit tougher, so try to be efficient with your cutting layout.
Decorating Like a Pro (Without Losing Your Mind)
You've baked a perfect batch of cut out sugar cookies. Now the real fun (or stress) begins. The world of cookie decorating is vast, but let's break down the three most common methods, from easiest to most advanced.
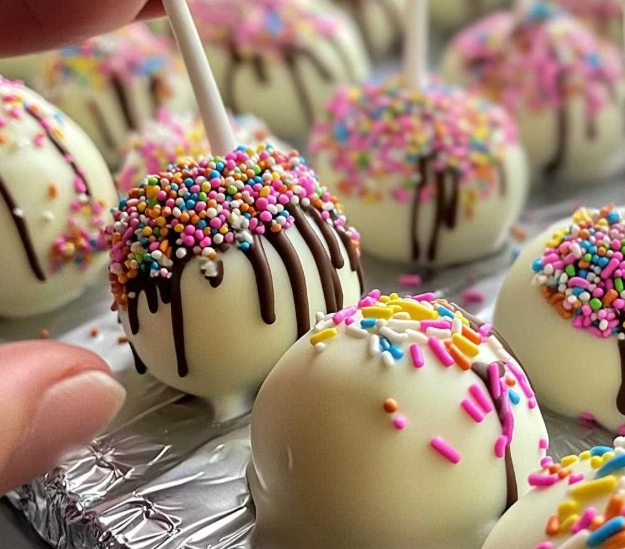
1. The Simple Sprinkle: Perfect for kids and quick results. Brush the unbaked cookie cut-out with a tiny bit of milk, egg wash (1 egg + 1 tbsp water), or even just water. Then, generously press sprinkles, sanding sugar, or nonpareils into the surface. They'll bake on and stay put. Easy, effective, zero drying time.
2. Glaze Icing (My Go-To for Home Bakers): This is the happy medium between royal icing and a simple drizzle. It's what I use 90% of the time. It sets with a slight crust but stays soft underneath, and it's much more forgiving than royal icing.
My basic glaze recipe:
- 2 cups powdered sugar, sifted
- 2-3 tbsp milk (or cream for extra richness)
- 1 tbsp light corn syrup (for shine and a slight chew)
- 1 tsp vanilla extract
- Pinch of salt
Whisk until smooth. You want the consistency of thick pancake batter. Too thick? Add milk drop by drop. Too thin? Add more powdered sugar. Divide and color with gel food coloring (liquid colors will thin it out too much). Use a small offset spatula to spread it, or put it in a squeeze bottle for outlining and flooding. It sets in a few hours.
3. Royal Icing (The Pro Standard): This is what gives those cookies with flawless, smooth, hard surfaces. It dries completely hard, making it ideal for packaging and intricate detail work. The base is just powdered sugar, meringue powder (or egg whites), and water. Meringue powder, available at craft stores, is my preference as it's pasteurized and safe from salmonella concerns—a point emphasized by food safety resources like the USDA Food Safety guidelines when using raw egg whites.
Answering Your Burning Sugar Cookie Questions
Over the years, through comments and friends' frantic texts, I've heard it all. Here are the real-world answers to the most common sugar cookie recipe dilemmas.
Why did my cookies spread into one giant blob?
This is the #1 complaint. The usual suspects: butter too warm, dough not chilled, too much sugar or not enough flour (did you spoon and level?), baking powder that's past its prime, or an over-greased baking sheet. Parchment paper or silicone mats are your friends—they provide just the right amount of release without promoting spread.
Can I make this sugar cookie recipe ahead of time?
Absolutely, and you should! The dough balls or discs keep wrapped tightly in the fridge for up to 3 days. The flavor gets better. You can also freeze the dough for up to 3 months. Thaw overnight in the fridge before using. Baked, undecorated cookies freeze beautifully in an airtight container for 1-2 months.
My cookies are tough and hard. What went wrong?
You likely over-mixed the dough after adding the flour, or you measured your flour by scooping directly from the bag (which packs it in). Too much flour is a death sentence for tenderness. Also, check your baking time. Over-baking evaporates all the moisture, leaving you with a sweet cracker.
What's the best way to store decorated sugar cookies?
It depends on the icing! For glaze-iced cookies, store them in a single layer in an airtight container at room temperature. They can be stacked with parchment paper between layers after 24 hours when the glaze has fully set. For royal icing cookies, once fully dry (like, 24 hours dry), they are incredibly sturdy and can be stacked or stored in tins. A silica gel packet in the container helps in humid climates.
Can I make these without a mixer?
You can, but creaming the butter and sugar by hand is a serious arm workout. For the initial creaming step, I'd strongly recommend a hand mixer or stand mixer to get that crucial air incorporation. Once you add the flour, you can switch to a spatula or wooden spoon to avoid overmixing.
The Final Verdict: Building Your Confidence
Look, a great sugar cookie recipe is more than a list. It's a foundation you can build on. Start with the master recipe. Follow the chilling rules for cut-outs. Play with the texture adjustments once you're comfortable. Don't be afraid to mess up a batch of icing—it's just sugar and water, you can always make more.
The real joy comes when you stop following a recipe like a robot and start understanding the principles. Why does chilling work? Why does an extra yolk make it softer? That knowledge turns baking from a stressful task into a creative, reliable outlet. You'll develop your own little tweaks—a pinch of almond extract, a sprinkle of flaky salt on top, a dash of citrus zest.
So, preheat that oven, pull out the butter to soften, and give it a go. This time, with all these tools in your back pocket, you're not just hoping for the best. You're engineering it. And honestly, isn't that the sweetest victory of all?
Got a specific sugar cookie disaster you need help diagnosing? Or a brilliant tip of your own? That's the fun part—the conversation never really ends. Happy baking!

Leave a Comment