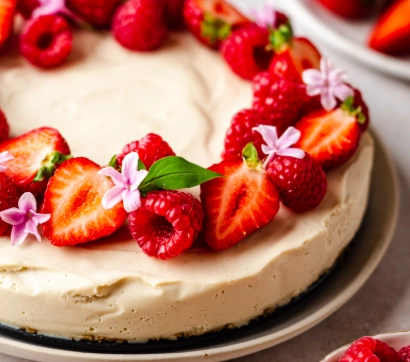
Let's be honest. The idea of a classic baked cheesecake is intimidating. The water bath, the potential cracks, the long cooling time—it's a commitment. That's where the no-bake cheesecake recipe swoops in as the hero of easy, impressive desserts. But here's the thing most recipes won't tell you: a great no-bake cheesecake isn't just about mixing stuff and chilling it. The difference between a sloppy, too-soft mess and a sliceable, luxuriously creamy masterpiece lies in a few critical, often overlooked details. I've made (and eaten) enough of these to fill a bathtub, and I'm here to share the real secrets, not just another list of ingredients.
Your Quick Guide to No-Bake Cheesecake Success
Why No-Bake Cheesecake Wins Every Time
It's not just about skipping the oven. The appeal is deeper. On a hot summer day, the last thing you want is to heat up the kitchen. For a last-minute gathering, you need something that comes together fast. And for beginner bakers, the fear of failure is real—no-bake is forgiving. The texture is different, too. It's lighter, airier, and more mousse-like than its dense baked cousin. But that lightness is a double-edged sword; get the structure wrong, and you have soup.
I remember my first attempt. I followed a popular online recipe to the letter, used the suggested amount of gelatin, and ended up with a dessert that jiggled so violently it threatened to leap off the plate. It tasted fine, but the mouthfeel was all wrong—bouncy, not creamy. That's when I started digging into the science of it.
The Ingredients Breakdown: What Really Matters
Every component has a job. Mess with the balance, and the whole thing suffers.
The Crust: More Than Just Crumbs
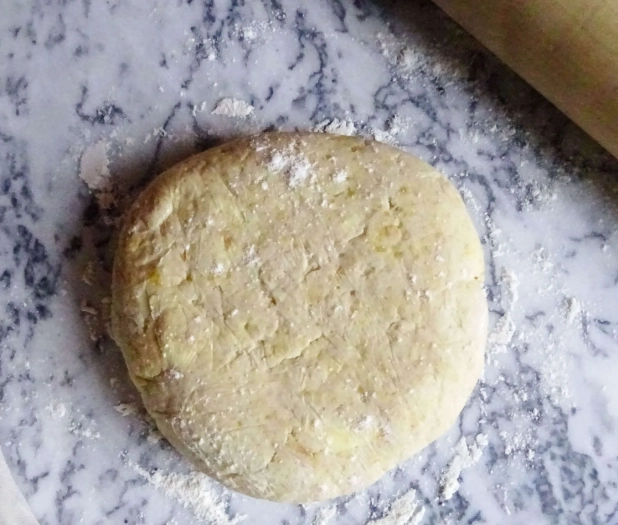
Graham crackers are the classic, but they can be sweet and one-dimensional. I often use a 50/50 mix of graham crackers and digestive biscuits (like McVitie's) for a more complex, buttery flavor. The binder is crucial: melted butter. Not softened, melted. And you need enough to make the mixture look like wet sand. If you pinch it, it should hold its shape. Too little butter, and your crust will be a crumbly disaster when you slice. A pro trick? Add a tablespoon of brown sugar to the crust mix. It adds a hint of caramel and helps with binding.
The Filling: Cream Cheese & Beyond
Full-fat Philadelphia cream cheese is the gold standard. The brick style, not the tub. The tub stuff has stabilizers and a higher water content that can ruin your texture. Let it sit on the counter until it's truly room temperature—this is non-negotiable for a smooth filling without lumps.
The sweetener is usually powdered sugar (icing sugar). Its fine texture blends seamlessly, and the cornstarch in it actually helps with thickening. Granulated sugar can leave a gritty feel.
Heavy cream (double cream in the UK, min 36% fat) is whipped to soft peaks and folded in. This is what gives the filling its airy lift. Under-whip, and you lose volume. Over-whip, and it becomes grainy and hard to fold.
The Setter: The Great Thickener Debate
This is the heart of the operation. How do you make it firm enough to slice?
| Thickener | Best For | How to Use | My Honest Take |
|---|---|---|---|
| Gelatin (Powdered or Sheets) | A firm, clean slice. Classic deli-style texture. | Bloom in cold water, dissolve completely in warm liquid (like lemon juice), then mix into filling. | Powerful and reliable, but easy to overdo. Can give a slightly bouncy, "Jell-O" feel if you use too much. Must be fully dissolved or you get rubbery bits. |
| Whipped Cream | A lighter, mousse-like texture. Sets softly. | Whip cream to stiff peaks. The air and fat provide structure when chilled. | My personal favorite for flavor. The texture is luxurious, but it requires a long, firm chill (overnight). Won't hold a sharp edge as well as gelatin. |
| Cornstarch (Cooked) | A custard-like, dense set. Good for tropical flavors. | Cook with a portion of the dairy and sugar into a thick paste (a "panada") before blending. | Adds a cooked flavor I don't always love in a "no-bake" dessert. Can be a bit starchy. Useful for stabilizing acidic fruit purees. |
My go-to hybrid method? A tiny amount of gelatin (like half a packet) combined with properly whipped heavy cream. You get the stability of gelatin with the dreamy texture of whipped cream. It's the sweet spot.
Expert Insight: The single biggest mistake I see is over-mixing the filling after adding the whipped cream. You deflate all that precious air. Fold gently with a spatula just until no white streaks remain. A few tiny streaks are better than a dense filling.
The Foolproof Classic Recipe (Step-by-Step)
This is my baseline, perfected over a decade. It uses the hybrid set method for guaranteed success.
For the Crust:
- 200g (about 1.5 cups) graham cracker/digestive biscuit crumbs
- 2 tbsp light brown sugar (optional but recommended)
- 100g (7 tbsp) unsalted butter, melted
- Pinch of salt
For the Filling:
- 1.5 tsp (half a standard packet) powdered unflavored gelatin
- 3 tbsp cold water
- 450g (16 oz) full-fat cream cheese, room temp
- 150g (1.25 cups) powdered sugar, sifted
- 1 tsp pure vanilla extract
- 240ml (1 cup) heavy cream, cold
- Zest and juice of 1 lemon (about 2 tbsp juice)
Method:
1. Crust: Combine crumbs, brown sugar, and salt. Pour in melted butter and mix until it resembles wet sand. Press firmly and evenly into the bottom and slightly up the sides of a 9-inch springform pan. Use the bottom of a glass to compact it. Chill for 30 minutes.
2. Bloom Gelatin: Sprinkle the gelatin over the 3 tbsp of cold water in a small ramekin. Let it sit for 5-10 minutes until it looks like a solid, spongy blob.
3. Cheese Base: In a large bowl, beat the room-temperature cream cheese with an electric mixer until completely smooth and creamy, about 2 minutes. Scrape down the sides. Add the sifted powdered sugar and vanilla, beat again until smooth.
4. Activate Gelatin: Microwave the bloomed gelatin for 10-15 seconds until it becomes a clear liquid. Do not let it boil. Alternatively, place the ramekin in a small pan of simmering water. Stir the warm lemon juice into the liquid gelatin. While the mixer is running on low, slowly drizzle the gelatin-lemon mixture into the cream cheese base. Beat until fully incorporated.
5. Whip & Fold: In a separate, cold bowl, whip the heavy cream to firm peaks. Add about one-third of the whipped cream to the cheese mixture and fold vigorously with a spatula to lighten it. This makes folding the rest easier. Gently fold in the remaining whipped cream and lemon zest until just combined.
6. Chill: Pour the filling onto the chilled crust, smooth the top, and tap the pan gently on the counter to release air bubbles. Cover with plastic wrap (touching the surface to prevent a skin) and refrigerate for at least 8 hours, ideally overnight.
Pro Tips for the Perfect Texture
Chilling time is not a suggestion. Four hours is not enough. The fats need time to fully firm up. Overnight is best.
Run a thin, hot knife under hot water, wipe it dry, and then slice. Repeat for each cut. It makes a shockingly clean slice.
If your filling seems too soft after mixing, don't panic. Just pour it into the crust and chill. It will set. Trust the process. Adding more thickener mid-stream is a recipe for lumps.
Creative Flavor Variations to Try
The classic is a blank canvas.
Lemon Berry Swirl: After pouring filling into the pan, dollop with 3-4 tbsp of seedless raspberry or strawberry jam. Use a knife to swirl it gently.
Salted Caramel Pretzel Crust: Replace the graham crackers with crushed salted pretzels. Add 2 tbsp of caramel sauce to the melted butter. Drizzle more caramel on top before serving.
Chocolate Espresso: Add 150g of melted and cooled dark chocolate to the cream cheese base. Dissolve 1 tbsp of instant espresso powder in the warm gelatin mixture.
No-Bake New York Style Hack: Add 1 extra tbsp of lemon juice and a pinch of salt to the filling. The extra tang mimics the sour cream note of a baked New York cheesecake.
Your No-Bake Cheesecake Questions, Answered
Why is my no-bake cheesecake too soft and won't slice?
The most common culprits are under-whipped cream, not enough chilling time, or a warm kitchen. Ensure your cream is cold before whipping and gets to firm peaks. The fridge needs a solid 8 hours to work its magic. If your kitchen is very warm, let it chill an extra 2-3 hours before serving.
Can I make a no-bake cheesecake without gelatin?
Absolutely. Rely solely on the structure of whipped cream. Whip your cream to very stiff peaks and make sure your cream cheese is firm from the fridge, not room temp, when you beat it. The trade-off is a softer, more mousse-like set that requires a longer, colder chill (overnight in the back of the fridge). It won't hold a picture-perfect slice as well, but the flavor is pure and unaltered.
My crust is soggy. How do I prevent that?
Two reasons: you didn't press it firmly enough, or you poured warm filling onto it. A loose crust has air pockets that filling seeps into. Press it down hard. Also, ensure your filling mixture is cool to the touch before pouring. If it's still warm from the gelatin, let it sit at room temp for 10 minutes, stirring occasionally.
Can I use low-fat cream cheese and cream?
You can, but you shouldn't. The fat is what gives the cheesecake its structure and rich mouthfeel. Low-fat versions have more water and gums, which will lead to a weepy, less stable, and frankly, less delicious filling. For a special dessert, use the full-fat stuff. It's worth the indulgence.
How long does it last in the fridge?
Properly covered, it will keep for 4-5 days. The crust will gradually soften, but it's still perfectly edible. For the best texture, consume within 3 days. It does not freeze well—the whipped cream structure tends to break down and become grainy upon thawing.
Leave a Comment