Let's be honest, we've all been there. A sudden craving for something sweet hits, but the idea of dragging out the mixer, preheating the oven, and washing a mountain of bowls feels like a marathon. Or maybe you're just starting out in the kitchen and complex recipes are intimidating. That's where the magic trio comes in: three ingredients, zero baking, and a can of sweetened condensed milk. These aren't just "easy" desserts; they're lifesavers. They're the answer to potluck panic, last-minute guests, and that 9 PM sugar emergency. And the best part? They consistently deliver a rich, creamy, satisfying result that feels far more indulgent than the effort required.
What's Inside: Your Quick Guide
Why 3-Ingredient No-Bake Desserts with Condensed Milk Are a Game-Changer
It's not just about simplicity. It's about a specific kind of culinary alchemy. Sweetened condensed milk—that thick, syrupy, shelf-stable milk with about 40% of its water removed and sugar added—is the secret weapon. According to the U.S. Dairy Export Council, its stability and sweetness make it a foundational ingredient in global confections. When you combine it with the right partners, it acts as both sweetener and binder, creating a luscious texture without any heat.
Think about the user scenarios. A parent needs a kid-friendly cooking project that's safe and fast. A college student in a dorm with only a mini-fridge and a microwave (which you won't even need). Someone with a tiny kitchen and minimal equipment. These desserts erase those barriers. They also solve the "I need a dessert in an hour" problem, as most just require mixing and chilling. The flavor payoff is huge: think chewy fudge bites, creamy icebox cakes, and tropical fruit bars, all from a formula so simple you can memorize it.
The Core Principles: How to Choose Your Three Ingredients
This is where most beginners go on autopilot and miss the nuance. It's not just "pick any three things." There's a structure, a balance that makes these recipes work every single time. Get this right, and you can invent your own combinations.
1. The Star: Sweetened Condensed Milk (Non-Negotiable)
This is your liquid gold. It provides sweetness, creaminess, and structure. A common mistake is grabbing evaporated milk by accident. They look similar, but evaporated milk is unsweetened and runny. Using it will give you a soupy, bland mess. Always check the label for "Sweetened Condensed Milk."
2. The Body: Something Crunchy or Chewy
This ingredient gives texture and substance. It soaks up the condensed milk and holds the dessert together. Biscuit or Cookie Crumbs: Digestive biscuits, graham crackers, or vanilla wafers are classics. A food processor makes quick work of them, or you can crush them in a bag with a rolling pin. Desiccated or Shredded Coconut: Adds a wonderful chew and tropical flavor. Toasting it lightly in a dry pan first (let it cool!) elevates the flavor dramatically. Crushed Nuts: Finely chopped peanuts, almonds, or pecans. They add a rich, toasty note and great texture. Rolled Oats: Use quick-cooking or pulsed old-fashioned oats for a heartier, almost granola-bar feel.
3. The Flavor Anchor: Your Punch of Taste
This defines the character of your dessert. It can be dry, wet, or even solid. Cocoa Powder: For instant chocolate flavor. Use natural unsweetened cocoa for a classic taste, or Dutch-process for a deeper, less acidic note. Citrus Zest & Juice: Lemon or lime zest and a bit of juice cut through the sweetness beautifully, creating a bright, refreshing dessert. Nut Butter: Smooth peanut butter or almond butter blends seamlessly, adding protein and a deep, savory-sweet flavor. Mashed Fruit: Ripe mango pulp, mashed bananas, or strawberry puree. This adds natural sweetness and moisture, but you may need to adjust chilling times as it makes the mixture softer.
Top 3-Ingredient No-Bake Dessert Recipes to Try Immediately
Let's move from theory to practice. Here are three foolproof recipes that cover different textures and flavor profiles. I've made each one dozens of times, and they never fail.
| Dessert Name | The 3 Ingredients | Key Steps & Texture | Chill Time |
|---|---|---|---|
| Chocolate Peanut Butter Balls | 1. Sweetened Condensed Milk 2. Creamy Peanut Butter 3. Crushed Graham Crackers or Digestive Biscuits |
Mix all into a thick dough. Roll into balls. Optionally roll in extra crumbs, cocoa, or melted chocolate. Texture is fudgy, chewy, and dense. | 30 min (to set) |
| Lemon Icebox Slice | 1. Sweetened Condensed Milk 2. Digestive Biscuit Crumbs 3. Fresh Lemon Zest & Juice (from 2-3 lemons) |
Mix crumbs with most of the condensed milk for base, press into a pan. Mix lemon zest/juice with remaining milk, pour over base. Sets into a creamy, tangy layer on a crumb crust. | 3+ hours (until firm) |
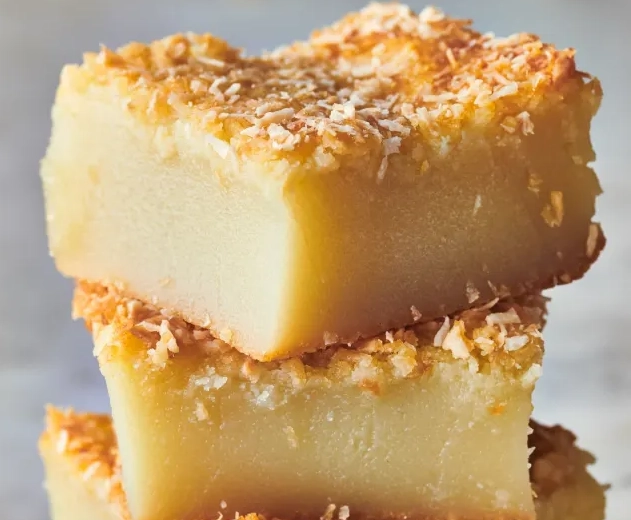
| Mango Coconut Bars | 1. Sweetened Condensed Milk 2. Desiccated Coconut 3. Mango Pulp (fresh or canned) |
Toast half the coconut. Mix all ingredients, spread in a pan, top with remaining untoasted coconut. Press down firmly. Texture is moist, chewy, and intensely tropical. | 2+ hours (until sliceable) |
Making the Chocolate Peanut Butter Balls: This is the easiest one to start with. Use a full 14-ounce can of condensed milk, about 1 cup of peanut butter, and 2.5 cups of fine crumbs. The mixture should be like a stiff cookie dough. If it's too sticky, add a few more crumbs. If it's too dry and won't hold together, add a tiny bit more condensed milk (a teaspoon at a time). Roll them into tablespoon-sized balls. For a more decadent version, after chilling for 20 minutes, you can dip the bottoms in melted chocolate. They keep in the fridge for a week, but good luck making them last that long.
The Lemon Icebox Slice Detail: The acid in the lemon juice reacts with the condensed milk, causing it to thicken naturally into a smooth, curd-like consistency without any cooking. It's a fantastic chemical trick. Use about 1/2 cup of lemon juice and the zest of all those lemons. Trust me, the zest is non-negotiable for that vibrant flavor. Press the crumb base firmly into a lined tin—this prevents it from crumbling when you cut it.
Pro Tips, Common Pitfalls, and How to Elevate Your Desserts
After making these for years, I've seen (and made) every mistake. Here’s how to avoid them and take your desserts from good to great.
The Big Condensed Milk Confusion: I mentioned it, but it's the #1 error. Sweetened Condensed Milk is the one you need. Brands like Eagle Brand or Carnation are reliable. If you're outside the U.S., look for "Full Cream Sweetened Condensed Milk."
Texture Troubleshooting: Your mixture is too wet and won't hold shape? Add more of your "body" ingredient (crumbs, coconut) a tablespoon at a time. Too dry and crumbly? Add more condensed milk just a teaspoon at a time. Patience is key here; you can always add more, but you can't take it out. Your dessert is too soft after chilling? It likely needs more time. The fridge is not a magic box—it works slowly. Give it a full 4 hours, or even overnight, especially for slices or bars. The freezer can speed things up for balls or bites (30-45 minutes).
The "Fourth Ingredient" Secret (Shhh): While strictly breaking the 3-ingredient rule, these tiny additions make a world of difference and are probably already in your pantry. A pinch of salt in any recipe heightens all the other flavors. A half teaspoon of vanilla extract adds warmth and depth. A tablespoon of melted butter mixed into your crumb base makes it richer and helps it hold together better. Consider these "cheat codes" for when you want to impress.
Presentation Matters: Don't just dump them in a tub. Press your slice mixtures into a small, neat pan lined with parchment paper for clean cuts. Roll balls in contrasting coatings: crushed nuts, cocoa powder, sprinkles, or even finely chopped dried fruit. For the lemon slice, a dusting of powdered sugar or a few thin lemon slices on top before serving makes it look professional.
Frequently Asked Questions (FAQs)
Can I use evaporated milk instead of condensed milk for a less sweet dessert?
My mixture is too wet/dry, what went wrong?
How long do these desserts last in the fridge or freezer?
 Can I make these desserts vegan?
Are these desserts suitable for kids' parties or lunchboxes?
The beauty of these 3-ingredient, no-bake condensed milk desserts is their sheer adaptability. They respect your time, your budget, and your skill level without compromising on the joy of a homemade treat. Start with a classic recipe from the table, master the texture, and then start experimenting. Swap the lemon for lime, the peanut butter for speculoos cookie butter, the cocoa for matcha powder. Once you understand the foundational ratio, your pantry becomes your playground. So go open that can of condensed milk—your simplest, most satisfying dessert adventure is about to begin.


Leave a Comment