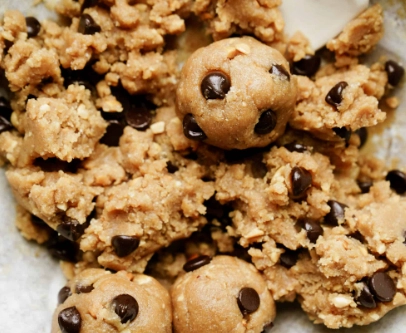
You've mastered the basics. Your sugar cookies hold their shape, your royal icing doesn't taste like chalk, and you can pipe a decent border. But now you're staring at those flawless, gallery-worthy cookies on social media and wondering, "How?" The jump from competent to exceptional in cookie decorating isn't just about practice—it's about precision, patience, and a handful of professional-grade techniques that most tutorials gloss over. This guide is about those techniques. We're moving past "flood and sprinkle" and into the realm of edible art, where the details make all the difference.
What You'll Master in This Guide
- The Foundation: Why Your Icing Consistency is Everything
- Essential Tools for Advanced Cookie Decorators
- Mastering the Flooding Technique for a Smooth Canvas
- Taking it Further: Piping, Painting, and Embellishments
- The Pro's Pantry: Ingredients That Make a Difference
- Common Advanced Decorating Mistakes (And How to Fix Them)
- Your Advanced Cookie Decorating Questions Answered
The Foundation: Why Your Icing Consistency is Everything
Let's be honest, we've all been there. You mix up a batch of royal icing, it looks perfect, you start flooding, and then... it either sits in a stiff peak refusing to spread, or it races over the dam and spills off the edge of the cookie. The single biggest differentiator between amateur and pro work is the obsessive control over icing consistency. It's not one consistency; it's at least three, and knowing when to use each is non-negotiable.
Most guides talk about "10-second icing" for flooding. That's a decent starting point, but it's a moving target. Humidity in your kitchen can turn 10-second icing into 5-second icing in an hour. Here's the nuanced approach I've developed after a decade of fighting Florida humidity:
The 10-Second Rule: Testing Icing Consistency Like a Pro
Instead of just cutting a figure-eight, try this: Drag a butter knife or a small offset spatula through the center of your icing in the bowl. Start a timer. Watch how the line fills in. The moment the surface becomes perfectly smooth again, stop the timer. That's your "number." For flooding large areas, aim for 12-15 seconds. For smaller, more controlled areas, 8-10 seconds is better. For intricate lace or filigree work, you might need a thicker 18-20 second consistency that still flows but holds a finer line.
Stiff Peaks vs. Soft Peaks: When to Use Which
This is where the magic happens. Stiff peak icing (think meringue-like) is for:
- Building 3D elements like bows or flowers.
- Piping intricate lace, basketweave, or embroidery details.
- Creating "glue" for attaching sprinkle mixes or other decorations.
Medium/soft peak icing (holds its shape but droops slightly) is for:
- Creating textured effects like fur or grass.
- Piping borders that need a little more body than flood icing but still need to settle.
- Lettering where you want a slight dimension.
The mistake I see constantly? People using flood consistency for everything because it's easier to squeeze from the bag. The result is flat, undefined designs. Commit to mixing separate bowls for different consistencies. It's extra dishes, but it's the secret to dimensional, professional work.
Essential Tools for Advanced Cookie Decorators
You can't do fine calligraphy with a fat marker. The same logic applies to cookie decorating. Upgrading your tools isn't about buying the most expensive brand; it's about selecting the right tool for the specific job. Here’s a breakdown of what actually matters in a pro's toolkit.
| Tool | Pro-Grade Recommendation | Why It Matters for Advanced Work |
|---|---|---|
| Piping Tips | PME Supatubes or Wilton tips (size 1.5, 2, 3 are workhorses) | Consistent, sharp openings prevent ragged lines. PME tips are longer, reducing hand fatigue during long piping sessions. |
| Piping Bags | Disposable 12" bags (I prefer the thicker "professional weight" ones) | Thicker plastic doesn't burst as easily under pressure from stiff icing. The 12" size gives you more control when only half-full. |
| Food Coloring | Gel or paste colors (Americolor, Chefmaster, Sugarflair) | Intense color without diluting your icing consistency. Crucial for achieving deep blacks, vibrant reds, and realistic skin tones. |
| Scribe Tool | A dedicated scribe needle or even a toothpick | Essential for popping air bubbles in flooded icing, guiding icing into tight corners, and creating marbling effects. |
| Edible Markers/Printer | Food-safe ink pens, edible image printer (like Canon Ivy) | For photorealistic details, intricate portraits, or consistent lettering that's impossible by hand. This is a game-changer for custom orders. |
| Good Lighting | A daylight-spectrum lamp | Prevents eye strain and ensures you see colors and details accurately. This is an underrated but critical tool. |
A specific tool that changed my work: a tipless piping bag coupler system. Instead of struggling to fit a metal tip into a bag, you screw a plastic coupler inside the bag, snip the tip to the coupler's opening, and then screw different sized plastic "tips" on the outside. It lets you change line sizes in seconds without changing bags. For someone doing multi-color designs, it saves hours and reduces waste.
Mastering the Flooding Technique for a Smooth Canvas
Flooding seems simple: fill an area with icing. But a perfectly smooth, glass-like flood is the hallmark of a pro. The key isn't just the icing consistency; it's the method.
The Two-Step Process (Outline & Flood) is Non-Negotiable. Always pipe a dam or outline with a slightly thicker consistency (stiff peaks) using a smaller tip (like #2). Let this crust for 5-10 minutes. This dam is your retaining wall. Then, fill the interior with your thinner flood consistency. Don't overfill! Fill just below the top of the dam.
Here’s the subtle move most people miss: Use your scribe tool to gently push the flood icing into the corners and edges. Don't just dump and hope it spreads. Actively guide it to ensure even coverage and prevent gaps. Then, immediately tap the cookie firmly on the table 3-4 times. This forces air bubbles to the surface, which you can pop with the scribe.
Taking it Further: Piping, Painting, and Embellishments
Once your flood is dry (let it dry overnight, seriously), the real fun begins. This is where you add dimension and personality.
Wet-on-Wet vs. Wet-on-Dry
Wet-on-Wet: Adding dots, lines, or designs onto wet flood icing before it crusts. The designs sink and merge slightly, creating a soft, blended effect. Perfect for simple marbling or creating "confetti" looks. Timing is critical—too wet and the design disappears, too dry and it sits on top.
Wet-on-Dry: Adding details onto fully dried icing. This gives you sharp, crisp lines and full dimension. This is for lace, embroidery, lettering, and any detail you want to stand out.
Hand-Painting with Edible Paints
Mix a tiny amount of gel food color with a few drops of clear alcohol (vodka or everclear) or lemon extract. The alcohol evaporates quickly, preventing the icing from dissolving. Use fine paintbrushes. This technique is unbeatable for shading, creating watercolor washes, or adding realistic details like facial features or floral gradients. Start light—you can always add more color.
Embossing and Stenciling
For a textured look, press a clean silicone mold or even a piece of lace into the wet flood icing, then carefully peel it away. For stenciling, secure a food-safe stencil over a dried cookie and spread a thin layer of royal icing or airbrush color over it. Lift straight up for a sharp design.
My favorite advanced trick? Using edible luster dust mixed with a drop of vodka to create a metallic paint. Painting gold accents on a black cookie or silver details on a "metal" robot cookie elevates it instantly from cute to couture.
The Pro's Pantry: Ingredients That Make a Difference
Not all meringue powder is created equal. Not all extracts taste good. The ingredients you choose directly impact the final look, taste, and durability of your cookies.
- Meringue Powder: I've tested dozens. The one from Wilton is consistent and widely available, but some smaller brands (like Chefmaster) offer a slightly whiter, sturdier result. The protein content matters—it affects drying time and hardness.
- Powdered Sugar: Always, always sift it. Lumps in your sugar mean lumps in your icing, which will clog your smallest piping tips. I sift mine twice if I'm doing ultra-fine work.
- Extracts & Flavors: Pure vanilla extract is a must. But consider almond extract (just a drop!), lemon, or even butter flavor. For a truly professional touch, use vanilla bean paste—you see the tiny seeds in the cookie, and the flavor is incredible. Avoid artificial extracts that can taste chemical or bitter.
- Clear Vanilla: This is a contentious one. It keeps your icing snow-white, which is crucial for certain colors. But the flavor is often artificial. My compromise? Use clear vanilla for the bulk of my white icing, then add a tiny bit of pure vanilla to a portion I'll flavor more strongly.

Common Advanced Decorating Mistakes (And How to Fix Them)
Even pros make mistakes. The difference is knowing how to salvage the work.
1. The Icing Bleed: Dark colors (red, black, navy) bleeding into adjacent white or light areas. This is often due to using too much liquid food coloring. Fix/Prevention: Use gel colors. For deep colors, mix them hours or even a day in advance and let them sit covered—the color deepens without needing more liquid. Always ensure the base color is completely dry before piping a dark color next to it.
2. Cratering or Pitting: Little holes or dimples in the dried flood. Usually caused by air bubbles you missed or icing that was slightly too thick. Fix: As mentioned, spot-fix with fresh icing. For prevention, tap vigorously and use your scribe tool like a detective.
3. The "Bulldozer" Effect: When adding wet-on-dry details, you accidentally scrape or gouge the dry base layer. Fix: Use a lighter touch. Ensure your detail icing isn't too stiff—it should flow easily without you squeezing the bag too hard. If you do gouge it, let it dry completely, then sand it gently with a clean, dry finger or a fine microplane and re-flood that tiny spot.
4. Color Inconsistency: Mixing multiple batches of "sky blue" that don't match. Fix: Mix all the color you'll need for a project in one large batch. If you must mix a second batch, note the exact number of drops of each color used in the first batch. Better yet, weigh your icing and use toothpick dips to measure color for ultimate precision.


Leave a Comment