Let's be honest, the first time you see a picture of a gorgeous, blistered, crusty sourdough loaf with an open, holey crumb, you want to make it. Then you start reading about it. Starter? Hydration percentages? Autolyse? Bulk fermentation? It can feel like you need a degree in biochemistry just to bake bread. I felt exactly the same way. My first few attempts were... well, let's just say they were better suited as doorstops than dinner. Dense, gummy, or flat as a pancake. But that's the thing about sourdough bread recipes – once you get the feel for it, it stops being a science project and starts being this incredibly rewarding, almost meditative practice. And the taste? Nothing from a store comes close.
This guide isn't about one perfect recipe. It's about giving you the map and the tools so you can navigate your own sourdough journey. We'll break down every single step, demystify the jargon, and I'll share the mistakes I made so you can (hopefully) skip them. Whether you're staring at a bag of flour wondering where to begin, or you've got a starter bubbling away but your loaves aren't quite right, there's something here for you.
Quick Guide
- Part 1: The Heart of It All – Your Sourdough Starter
- Part 2: The Foundation – A Classic, No-Fuss Sourdough Bread Recipe
- Part 3: Leveling Up – Flour, Hydration, and Advanced Techniques
- Part 4: The Sourdough Problem Solver – Why Did My Bread Turn Out Like That?
- Part 5: Beyond the Basic Loaf – Sourdough Discard Recipes & Variations
- Wrapping It Up: The Sourdough Mindset
Part 1: The Heart of It All – Your Sourdough Starter
You can't talk about sourdough bread recipes without the star of the show: the starter. This is your colony of wild yeast and friendly bacteria (mostly Lactobacillus). Commercial yeast is a single strain, packaged for consistency. Your starter is a living, breathing ecosystem unique to your kitchen. That's why no two sourdoughs taste exactly alike.
Creating Your Starter from Scratch
You need just two things: flour and water. Non-chlorinated water is best (chlorine can inhibit microbes). Let tap water sit out for a few hours, or use filtered/bottled. For flour, whole grain rye or whole wheat flour gives the best kickstart because it's packed with nutrients and microbes. I started mine with whole rye.
Day 1: In a clean jar (a wide-mouth quart-sized glass jar is perfect), mix 50g of whole rye flour with 50g of lukewarm water. Stir until it's a thick, paste-like consistency. Scrape down the sides. Loosely cover (a lid set on top, or a cloth secured with a rubber band). Place it somewhere consistently warm, around 70-75°F (21-24°C). Do nothing else.
Day 2: You might see some bubbles, you might not. Don't panic. Discard about half of the mixture (yes, you just throw it away – this is the "sourdough discard" you'll later use in pancakes!). To the remaining starter, add another 50g of all-purpose or bread flour and 50g of lukewarm water. Stir, cover, leave.
Repeat this "discard and feed" process every 24 hours for about 5-7 days. By days 4-5, you should see it reliably doubling in size within 4-8 hours of a feed. It will smell pleasantly sour, like yogurt or ripe fruit. A sharp, acetone smell means it's hungry – just feed it on schedule. A hooch (a greyish liquid layer) on top? That's alcohol from fermentation. You can stir it in or pour it off before feeding. No big deal.
Maintaining Your Starter: The Fridge is Your Friend
Baking daily? Keep it on the counter, feeding it once a day. For the rest of us, the refrigerator is a lifesaver. A mature, active starter can live in the fridge, barely active, for weeks. When you want to bake, take it out 1-2 days before, give it a couple of feeds at room temperature to wake it up and make sure it's strong (doubles in 4-6 hours). After baking, feed it, let it sit at room temp for an hour or two, then pop it back in the fridge. This method generates less discard.
Is My Starter Ready? Do the "float test." Drop a small spoonful of your ripe starter (at its peak, right when it's doubled) into a glass of water. If it floats, it's full of gas and ready to leaven bread. If it sinks, it needs more time to ferment after feeding. It's not a perfect test, but a good indicator for beginners.
Now, with a bubbly, active starter, you're ready to actually bake. This is where most sourdough bread recipes begin.
Part 2: The Foundation – A Classic, No-Fuss Sourdough Bread Recipe
Let's walk through a standard, moderately-hydrated loaf. It's forgiving and a great foundation. Master this, and you can tweak endlessly.
Ingredients:
- 100g active, bubbly sourdough starter (at 100% hydration – meaning equal parts flour and water by weight)
- 350g lukewarm water
- 500g bread flour (or strong white flour)
- 10g fine sea salt
A digital kitchen scale is non-negotiable. Baking by weight is precise. Cups are inconsistent.
The Process, Step-by-Step
1. Autolyse (The Rest): In a large bowl, mix the flour and 325g of the water (reserve 25g) until no dry bits remain. It will be shaggy. Cover and let it rest for 30 minutes to 1 hour. This allows the flour to fully hydrate, developing gluten without kneading. It makes the dough smoother and more extensible.
2. Mixing: Add the 100g of starter and the salt sprinkled over the top. Pour the reserved 25g of water over the salt to help it dissolve. Now, get your hand in there! Squeeze and pinch everything together until it's fully incorporated. It will be sticky and messy. That's okay.
3. Bulk Fermentation (The First Rise): This is the most critical phase for flavor and structure. Cover the bowl. Over the next 3-5 hours (timing depends entirely on your room temperature), you'll perform a series of "stretch and folds." Every 30 minutes for the first 2 hours, wet your hand, grab one side of the dough, stretch it up, and fold it over the center. Do this around the bowl 4-5 times. This develops incredible strength without heavy kneading. After the folds, just let it sit. You'll see it gradually become smoother, more aerated, and increase in volume by about 30-50%. It should look alive.
The biggest mistake? Rushing bulk fermentation. If your kitchen is cold (below 70°F/21°C), it can take 6+ hours. Look for bubbles along the sides and a jiggly, domed surface. The time on a sourdough bread recipe is a suggestion, not a rule.
4. Shaping: Gently dump the dough onto a lightly floured surface. Don't punch it down! You want to preserve those gas bubbles. Shape it into a tight ball (a boule) or an oval (a batard). There are great video tutorials for this – it's all about creating surface tension. Place the shaped dough seam-side up into a floured proofing basket (banneton) or a bowl lined with a heavily floured kitchen towel.
5. Final Proof: You have two choices: proof at room temp for 1-3 hours until it looks puffy, or do a cold retard. The cold retard is a game-changer. Cover the basket and put it in the fridge for 12-18 hours (even up to 48). This slows fermentation, develops more complex sour flavor, and makes the dough easier to score and handle. For beginners, I highly recommend the cold proof.
6. Baking: Preheat your oven with a Dutch oven or heavy lidded pot inside to 450°F (230°C) for at least 45 minutes. Take your dough from the fridge, turn it out onto a piece of parchment paper. Score the top with a sharp blade or razor (a lame) – this controls where the bread expands. Carefully place the dough with the parchment into the scorching hot Dutch oven. Cover with the lid. Bake covered for 20 minutes. This creates a steamy environment for a great "oven spring" and crispy crust. Remove the lid, reduce heat to 425°F (220°C), and bake for another 20-25 minutes until deep, golden brown. Cool completely on a wire rack for at least 2 hours before slicing. I know it's hard to wait, but cutting it hot makes the crumb gummy.
Part 3: Leveling Up – Flour, Hydration, and Advanced Techniques
Once you're comfortable with the basic sourdough bread recipe, you can start playing. This is where the art comes in.
The Flour Matrix: Choosing Your Ingredients
Not all flours are created equal. The protein content (gluten) is key. For reference, the USDA maintains a nutrient database where you can check the typical protein content of various wheat types, though specific brands vary. Bread flour is typically 12-14% protein, all-purpose 10-12%. Higher protein generally means stronger gluten, which can handle higher hydration for more open crumbs.
Here’s a quick guide to how different flours behave in your sourdough bread recipes:
| Flour Type | Protein % (Approx.) | Role in Sourdough | Flavor & Texture Contribution |
|---|---|---|---|
| Bread Flour | 12-14% | Primary flour. High gluten strength. | Chewy, open crumb, tall oven spring. Neutral wheat flavor. |
| Whole Wheat Flour | 13-15% | Blend (10-30%). Adds nutrients. | Nutty, hearty flavor. Denser crumb, absorbs more water. |
| Rye Flour | 8-10% | Blend (5-20%). Ferments quickly. | Distinct tangy, earthy flavor. Less gluten, so can make dough sticky/slack. |
| Spelt Flour | 12-14% | Blend (up to 50%). Ancient grain. | Sweet, nutty flavor. Fragile gluten, handle gently. |
| All-Purpose Flour | 10-12% | Primary or blend. More forgiving. | Softer crumb, milder flavor. Good for beginners. |
I love a blend of 80% bread flour and 20% whole wheat or rye. It adds flavor without making the dough too hard to handle.
Hydration: The Dough's Personality
Hydration is the ratio of water to flour, by weight. Our basic recipe is about 70% hydration (350g water / 500g flour). Higher hydration (75-85%) is trendy for those dramatic, open, holey crumbs. But it comes at a cost: the dough is a sticky, wet, shapeless beast that's hard for a beginner to handle. Lower hydration (65-70%) is more manageable, yielding a tighter crumb that's better for sandwiches.
Don't get obsessed with ultra-high hydration. A well-fermented 72% hydration loaf can have a beautiful, even crumb and incredible flavor. It's more about technique than pushing the water percentage.
Alternative Methods: No-Knead & Stiff Starter
Short on time? A "no-knead" sourdough bread recipe simplifies things. Mix everything, let it bulk ferment for 8-12 hours at room temp (often with fewer stretch and folds), shape, cold proof, and bake. The crumb is more irregular but the flavor is still great.
Some bakers, particularly for certain enriched doughs or specific styles, use a stiff starter (lievito madre) which has a lower hydration (50-60%). It ferments slower and is said to produce a different, sometimes more complex acidity. The San Francisco Baking Institute discusses various preferment techniques used in professional settings. It's an advanced tweak, but shows the depth of this craft.
Part 4: The Sourdough Problem Solver – Why Did My Bread Turn Out Like That?
This is the part I needed most when I started. Let's diagnose common issues.
Dense, Gummy Crumb: The #1 complaint. Likely causes: 1) Under-proofed. The dough didn't ferment enough. Give it more time during bulk or final proof. 2) Cut while hot. Patience! 3) Weak starter. Make sure it's active and passes the float test. 4) Oven too cool. Ensure proper preheat.
Flat Loaf, No Oven Spring: 1) Over-proofed. The yeast exhausted itself. Try a shorter bulk or final proof, or use the fridge sooner. 2) Insufficient gluten development. Be more diligent with stretch and folds. 3) Poor shaping. Didn't create enough surface tension. Practice tightening the dough ball. 4) Deep score? A shallow score might not allow proper expansion.
Too Sour / Not Sour Enough: Sourness is controlled by fermentation time and temperature. A long, cool fermentation (like the cold retard) produces more acetic acid (sharp sourness). A shorter, warmer fermentation produces more lactic acid (milder, yogurt-like sourness). To reduce sourness, proof at room temp and bake the same day. To increase it, extend the cold proof.
Pale, Soft Crust: 1) Baked with steam too long or not enough. Keep the lid on for the first 20 min. 2) Oven temp too low. 3) Baked in a regular pan, not a Dutch oven. The Dutch oven traps steam perfectly. No Dutch oven? Place a tray of boiling water on the oven floor when you load the bread.
Your bread will tell you what it needs. Learn its language.
Part 5: Beyond the Basic Loaf – Sourdough Discard Recipes & Variations
Your starter needs regular feeding, which creates discard. Don't throw it away! It adds wonderful tang and tenderness to all sorts of baked goods, even though it's not active enough to leaven bread alone. It's the secret weapon of a sourdough kitchen.
- Sourdough Discard Pancakes/Waffles: The easiest start. Add a cup of discard to your favorite batter for a tangy, fluffy upgrade.
- Sourdough Crackers: Mix discard with olive oil, salt, herbs, roll thin, and bake. Irresistible.
- Sourdough Pizza Crust: Use discard in a same-day dough for incredible flavor.
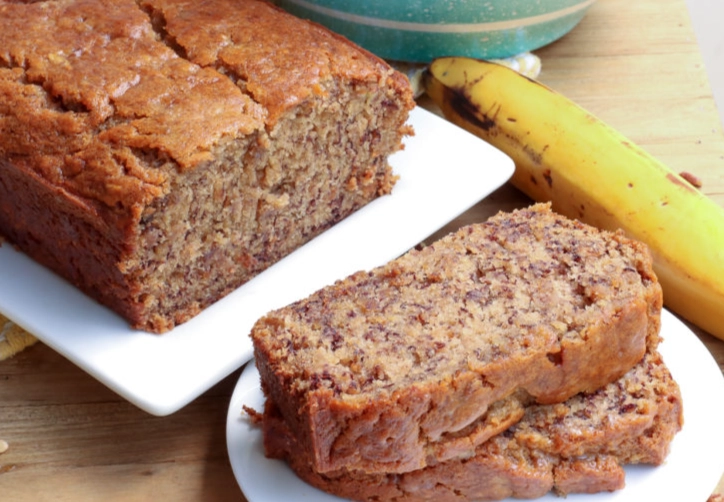
- Sourdough Chocolate Cake: Seriously. The discard adds moisture and a subtle complexity that balances the sweetness.
And for your main loaves, try variations! Add toasted walnuts and raisins during the stretch and folds. Mix in chopped olives and rosemary. Swirl in cinnamon sugar for a breakfast loaf. The basic sourdough bread recipe is your canvas.
Wrapping It Up: The Sourdough Mindset
After years of baking, I've learned that the best sourdough bread recipes are guidelines, not commandments. Flours differ. Kitchen temperatures swing. Starters have moods. The goal isn't to replicate a YouTube baker's exact loaf, but to make a delicious, nutritious, homemade bread that you're proud of.
It teaches you patience. It connects you to a process as old as civilization itself. And there's a simple, profound joy in tearing into a loaf you made from nothing but flour, water, and salt, leavened by a culture you keep alive.
So, grab your jar, mix some flour and water, and start the conversation. Your perfect sourdough is out there, waiting for you to bake it.


Leave a Comment