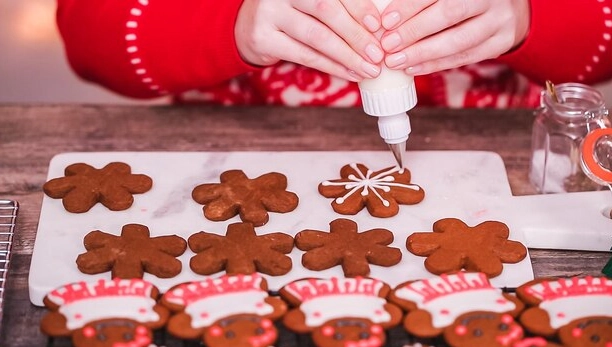
Icing sugar. It sits in your pantry, humble and white. You've probably used it to finish off a lemon drizzle or to make a glaze. But have you ever thought of it as your primary decorating tool? Forget the piping bags and the complex frosting for a moment. Learning how to decorate a cake with icing sugar is one of the most elegant, forgiving, and surprisingly versatile skills in a baker's toolkit. It turns a simple sponge into something special with minimal effort and maximum impact. The best part? It's almost impossible to mess up completely.
I remember my first attempt, years ago. I was making a birthday cake for a friend who disliked heavy buttercream. I panicked. How could a plain cake feel celebratory? I reached for a paper doily from the drawer and a sieve. The result was a delicate lace pattern that looked professional and tasted light. It was a revelation. Since then, I've used this technique on everything from rustic loaf cakes to sleek layer cakes.
What You'll Learn in This Guide
The Tools You Actually Need (Forget the Fancy Gear)
You don't need a specialty shop haul. You likely have 90% of this at home.
The Non-Negotiables:
- Icing Sugar (Powdered Sugar/Confectioners' Sugar): This is your paint. Make sure it's fresh and lump-free. If it's been in the cupboard for months, it might have absorbed odors. Sift it before you start, no matter what. Those tiny lumps will ruin a smooth pattern.
- A Fine-Mesh Sieve or Strainer: This is your brush. The finer the mesh, the more delicate and even the dusting. A tea strainer works for tiny areas, but a standard kitchen sieve is perfect.
- A Flat, Cooled Cake: Your canvas. The surface is key. A crusted buttercream, a firm ganache, a marzipan layer, or even a plain, slightly sticky sponge (like a génoise) works best. Avoid decorating a cake that's still warm or has a wet, sticky frosting that hasn't set.
The Game Changers:
- Stencils: This is where the fun begins. You can buy beautiful plastic baking stencils online or from cake supply stores. But your home is full of them: paper doilies (the classic), lace fabric (hold it taut), paper cut-outs (think snowflakes, hearts), or even fresh, flat leaves (like bay leaves) for a natural imprint.

- Small Offset Spatula or Butter Knife: For gently pressing a stencil onto the cake without tearing it.
- Cocoa Powder or Ground Spices: For contrast. A mix of cocoa and icing sugar can create beautiful monochrome shadows and depth.
Master the Basic Dust: It's All in the Wrist
Before you try patterns, get the simple dusting right. A perfect, even coat looks professional. A rushed, thick pile looks like an accident.
Here's the step-by-step most guides miss the nuance on:
- Prepare Your Canvas: Ensure your cake is completely cool. If it's frosted, let the frosting crust over. A Swiss meringue buttercream forms a perfect skin. American buttercream needs a little longer. Place the cake on your serving plate before you start. Moving it after dusting is a disaster.
- Load the Sieve: Place 2-3 tablespoons of sifted icing sugar into your sieve. Hold it over a bowl, not the cake.
- The High Hold: This is the secret. Hold the sieve 4-6 inches (10-15 cm) above the center of the cake. Most people hover an inch above and dump. That's your mistake. The height allows the sugar to fall like snow, distributing evenly.
The Gentle Tap: Tap the side of the sieve lightly with your finger or the heel of your hand. Don't shake it. A steady, rhythmic tap. Start in the center and slowly move the sieve in a circular motion to cover the top.- Build Layers: Want more coverage? Don't add more sugar to the sieve from a low height. Step back, reload the sieve, and repeat the high-and-tap process. This builds a soft, ethereal layer, not a dense blanket.
- Clean the Plate: Use a dry pastry brush to gently sweep any stray sugar off the serving plate for a clean finish.

Stencil Magic: From Paper Doilies to Custom Designs
This is where you create wow factor. The principle is simple: you block areas of the cake from the sugar, creating a negative space design.
How to Use a Stencil Without the Slip-and-Smudge
The biggest frustration is the stencil moving and blurring your design. Here's how to lock it in place.
For a Paper Stencil (Doily, Paper Cut-out):
- Lightly mist the surface of your cake with water using a clean spray bottle. One or two fine spritzes. Wait 30 seconds until it's just tacky, not wet.
- Gently lay your paper stencil on the cake. The slight tackiness will hold it.
- Use your fingers or a flat tool to press it down smoothly, especially at the edges.
- Dust with icing sugar as described above.
- The Critical Move: Carefully peel the stencil straight up. Do not slide it off. Sliding will smudge the edges.
For a Reusable Plastic Stencil:
- These are thicker and less likely to curl. You can use the water mist trick, or simply hold it firmly flat against the cake with one hand while dusting with the other. For larger cakes, a tiny dot of edible glue or even a dab of buttercream on the back of the stencil at the corners can act as an anchor.

Design Ideas to Try Tonight
The Classic Doily: Timeless for a reason. Use a round paper doily for a full-top pattern or a small one just on a corner.
The Geometric Border: Cut a simple stripe, zigzag, or polka dot pattern from parchment paper. Place it along the bottom or top edge of the cake. Dust. Remove to reveal a crisp border.
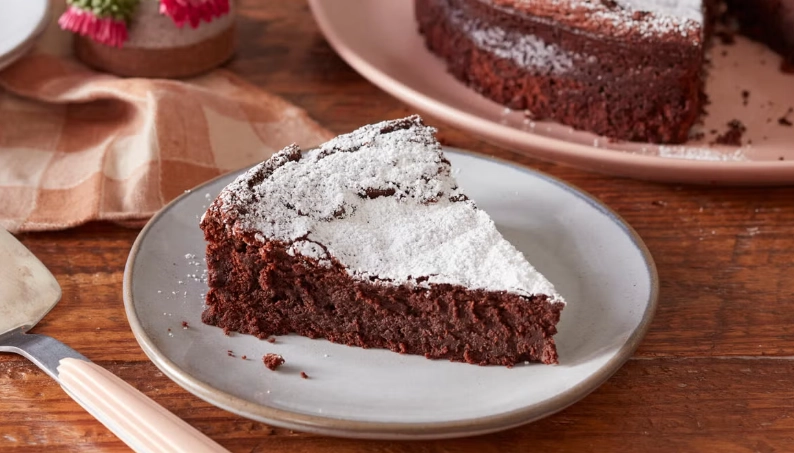
The Nature Print: Take a clean, flat leaf (like a fig leaf, bay leaf, or even a large herb leaf). Place it directly on the cake. Dust generously. Lift the leaf to reveal a detailed, botanical silhouette. This works amazingly on chocolate cakes where the green contrast is striking.
The Two-Tone Effect: First, use a stencil and dust with cocoa powder. Remove the stencil. Then, offset the stencil slightly or use a complementary one, and dust with icing sugar. You get a beautiful, shadowed, layered design.
Beyond the Basics: Creative Designs & Pro Tips
Once you're comfortable, you can combine techniques.
Combining with Fresh Fruit: Arrange a ring of berries or sliced figs on top of your cake. Dust lightly with icing sugar. When you remove the fruit, its outline remains clean against the sugared background. It's a simple but stunning look.
The "Dusted Side" Technique: Want to cover the sides? Hold a piece of parchment paper or a flexible plastic sheet against the frosted side of the cake, just touching it. Dust the exposed area above the paper. When you remove the paper, you'll have a sharp horizontal line of sugar on the side. You can create stripes or blocks this way.
Making Your Own Custom Stencil: If you want a specific monogram or logo, it's easy. Print your design. Tape it to a sheet of acetate (like a report cover) or thick parchment. Use a craft knife to carefully cut out the design. Now you have a sturdy, reusable custom stencil.
Your Icing Sugar Questions, Answered
How do you keep icing sugar decorations from melting or getting soggy?
Can you create intricate designs with just icing sugar and a stencil?
What's the biggest mistake beginners make when dusting a cake with icing sugar?
My stencil keeps sliding on the buttercream. How do I fix this?
So, next time you're looking at a plain cake and thinking it needs something more, don't stress over piping skills. Reach for that box of icing sugar and a sieve. Experiment with a paper doily from the back of the drawer. Play with a leaf from the garden. The beauty of this method is in its simplicity and the sheer room for creativity it allows. It's proof that sometimes, the most stunning decorations come from the simplest ingredients and a bit of know-how. Now go dust something.
Leave a Comment