Your Baking Companion Guide
Let's be honest. We've all been there. You follow a recipe to the letter, your kitchen smells amazing, but what comes out of the oven is... well, let's just say it wasn't what you saw on Pinterest. A dense brick disguised as banana bread. Cookies that merged into one giant, sad cookie-puddle. A cake that sank in the middle like a deflated football.
I've had more than my share of those moments. I still remember the first time I tried making macarons, completely ignoring room temperature importance, and ending up with a tray of flat, cracked cookies. It was a humbling, flour-dusted experience.
The difference between a baking win and a baking fail often isn't talent—it's knowing and applying the fundamental rules. So, what are the 10 basic baking rules that act as your kitchen guardrails? This isn't just a list; it's the why behind the what. We're going deep on each one, because understanding the principle is what makes you a baker, not just a recipe follower.
The Foundational Five: Rules You Simply Can't Bake Without
These first five are the absolute bedrock. Get these wrong, and it's almost impossible to recover. Think of them as the primary ingredients for success.
Rule 1: Read the Recipe. All of It. Twice.
I know, I know. It sounds too simple. But you'd be shocked how many disasters start right here. We get excited, see "mix flour and sugar," and jump in. But what are the 10 basic baking rules if not starting with the blueprint?
You're not just reading for ingredients. You're conducting a pre-bake reconnaissance mission.
- Check for time: Does it need chilling for 4 hours? You need to know that at 3 PM, not at 7 PM when you want to serve dessert.
- Spot the special equipment: Does it require a stand mixer, a candy thermometer, a specific pan size? Discovering you need a springform pan after the batter is made is a special kind of panic.
- Understand the process: Are you folding, beating, or stirring? Is the butter supposed to be creamed with sugar, or melted and cooled?
I once ruined a genoise sponge because I missed the "fold in the flour in three additions" part and dumped it all in at once. The result was tough and glutenous. A totally avoidable waste of good eggs and butter.
This is rule number one for a reason. It sets the stage for everything else.
Rule 2: Measure with Precision (and Know Your Flour)
"A cup of flour" is not just a cup of flour. Scoop it directly from the bag, and you might pack in 50% more than the recipe intended. This is the single biggest cause of dry, dense baked goods.
The gold standard? Weighing. A kitchen scale is the best $20 you'll ever spend on baking. It removes all guesswork. 120 grams of flour is 120 grams of flour, no matter how you scoop it.
If you must use cups, use the "spoon and level" method: fluff the flour in its container, spoon it lightly into the measuring cup, and level it off with the straight edge of a knife. Never tap the cup or pack it down.
And while we're on flour—not all flour is created equal. The protein content (which forms gluten) is crucial.
| Flour Type | Protein Content | Best Used For | Texture It Creates |
|---|---|---|---|
| Cake Flour | Low (7-9%) | Cakes, tender cookies, biscuits | Fine, soft, delicate crumb |
| All-Purpose Flour | Medium (10-12%) | Cookies, muffins, quick breads, some cakes | Versatile, balanced structure |
| Bread Flour | High (12-14%) | Yeast breads, bagels, pizza dough | Chewy, elastic, strong structure |
Using bread flour in a cake will make it tough. Using cake flour in a bread won't give it enough structure to rise properly. It matters.
Rule 3: Respect Ingredient Temperature (Butter & Eggs Are Divas)
This is where bakers separate from casual cooks. Room temperature doesn't mean "warm." It means about 65-70°F (18-21°C)—the temperature of a comfortable room. Your ingredients should feel neutral to the touch, not cold.
Why does it matter? It's all about emulsification. Room-temperature fat (butter) can trap air when creamed with sugar, which is the primary leavening for many cakes and cookies. Cold butter can't do this effectively. Room-temperature eggs incorporate evenly into a batter; cold eggs can cause the batter to break or curdle, especially when added to creamed butter.
How to quickly bring things to temp? For eggs, place them in a bowl of warm (not hot) water for 10 minutes. For butter, you can cut it into small cubes and let it sit for 30-45 minutes. Do not microwave it to soften—you'll melt it, which changes its functional properties completely.
There are exceptions, of course. Pie crust and flaky pastry demand cold butter. But the rule of thumb is: if the recipe says "cream butter and sugar," your butter needs to be room temp.
Rule 4: Don't Overmix the Batter (Gluten is Not Always Your Friend)
Once the flour hits the liquid, gluten starts to develop. Gluten is a network of proteins that gives structure and chew—great for bread, terrible for most cakes and muffins.
Overmixing a muffin batter is the fastest way to get tough, peaked muffins with tunnels inside. You want to mix just until the dry ingredients are barely incorporated. A few lumps are absolutely fine—they'll work themselves out in the oven. This is often described as "mixing until just combined."
For tender cakes and quick breads, use a gentle folding motion with a spatula once you add the flour. Put the electric mixer away at this stage.
Rule 5: Preheat Your Oven. Seriously.
This isn't a suggestion. It's a commandment. An oven that hasn't fully preheated is an unpredictable environment. The heating elements cycle on and off to maintain temperature. If you put a cake into a cold oven, the initial slow rise can be weird, the structure sets at the wrong time, and you often end up with poor volume and texture.
Give your oven a solid 15-20 minutes to preheat. Don't trust the beep—use an oven thermometer to verify the actual temperature. Ovens are notoriously inaccurate. I've had one that ran 25 degrees hot! Knowing that saved countless batches of cookies from burning.
Also, avoid opening the oven door frequently. Every time you do, the temperature drops significantly, causing uneven baking and potential collapse. Use the oven light and window to check.
The Finesse Five: Rules That Elevate Your Baking
These rules take you from "edible" to "exceptional." They're about control, timing, and the little details that show you care.
Rule 6: Prepare Your Pans Properly
Greasing and flouring isn't just slapping some butter around. The goal is a clean release, not a greasy residue.
- For most cakes: Use a pastry brush or paper towel to apply a thin, even layer of softened butter or neutral oil (like canola) to every crevice. Then, add a tablespoon of flour, tap and rotate the pan to coat, and tap out the excess. For chocolate cakes, use cocoa powder instead of flour to avoid a white dusting.
- For cookies: Parchment paper or silicone baking mats are game-changers. They prevent sticking, promote even browning, and make cleanup a breeze. No more scraping burnt cookie bits off your sheet pan.
- For breads: Often just a light greasing of the bowl for the first rise is enough, especially if you're using a banneton (proofing basket) dusted with rice flour.
Taking an extra two minutes here can be the difference between a beautiful, intact cake and one you have to piece together like a puzzle before frosting.
Rule 7: Understand Your Leaveners (Baking Soda vs. Powder)
They are not interchangeable. Using the wrong one, or using an old one, is a surefire path to flat baked goods.
Baking soda (sodium bicarbonate) is a base. It needs an acid (like buttermilk, yogurt, lemon juice, brown sugar, honey, or natural cocoa powder) to activate and produce carbon dioxide gas. It acts immediately, so batters with baking soda should be baked right away.
Baking powder contains baking soda and a dry acid (usually cream of tartar). It's double-acting: it reacts once when wet, and again when heated. This gives a more sustained rise, which is why it's so common.
Test your old containers: Add a teaspoon of baking soda to a few tablespoons of vinegar. It should fizz violently. For baking powder, add it to hot water. If it doesn't bubble vigorously, it's dead and needs to be replaced.
This rule is pure chemistry. Get it right.
Rule 8: Use a Timer, But Trust Your Senses More
The time given in a recipe is a guideline, not a guarantee. Your oven, your pan material (dark vs. light metal), and even the humidity in your kitchen affect baking time.
Start checking for doneness a few minutes before the timer goes off.
- Cakes & Quick Breads: Insert a toothpick or skewer into the center. It should come out with a few moist crumbs attached, not wet batter. The edges should also be pulling away slightly from the pan.
- Cookies: They often look underdone in the center when you take them out. They continue to cook ("carry-over cooking") on the hot baking sheet. For chewy cookies, take them out when the edges are set and the centers look puffy and soft. For crisp cookies, bake until golden brown throughout.
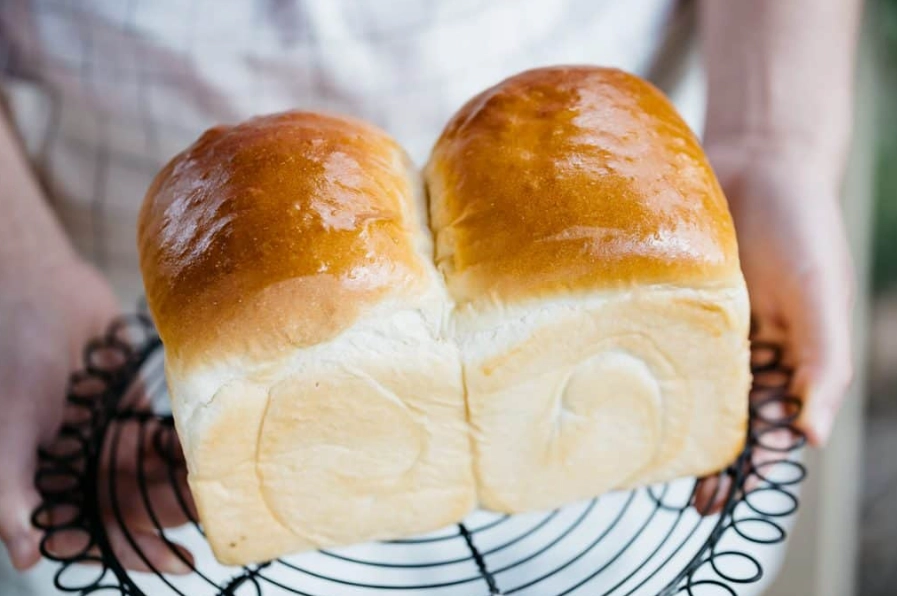
- Breads: The most reliable test is internal temperature. A fully baked loaf of yeast bread should register 190-210°F (88-99°C) on an instant-read thermometer. It should also sound hollow when tapped on the bottom.
Relying solely on the timer is like driving with your eyes closed. Use it as a reminder to look, smell, and test.
Rule 9: Cool Completely Before Cutting or Frosting
I get it. The temptation is real. That cake smells incredible, and you want to dive in. But patience is a baking virtue.
Baked goods continue to set as they cool. The structure firms up. Cutting into a warm cake will cause it to crumble and tear. Frosting a warm cake will melt the frosting into a gooey mess.
Most cakes need to cool in the pan for about 10-15 minutes, then be turned out onto a wire rack to cool completely (1-2 hours). The wire rack allows air to circulate, preventing a soggy bottom.
This rule is brutally simple but often ignored. Give your creation time to become its best self.
Rule 10: Practice Mise en Place (Everything in Its Place)
This is the chef's secret that home bakers should steal. Before you even turn on the oven, prepare everything.
- Read the recipe (see Rule 1!).
- Take out all your ingredients and equipment.
- Measure everything into small bowls or containers.
- Prep your pans.
- Preheat the oven.
Why? It prevents mid-recipe panic. You'll never realize you're out of vanilla halfway through creaming the butter. It also makes the actual mixing process smooth, calm, and enjoyable. You can focus on technique instead of scrambling.
It feels a bit fussy at first, I admit. But once you try it, you'll never go back. It transforms baking from a stressful chore into a relaxed, almost therapeutic process.
Your Burning Baking Questions, Answered
Knowing the rules is one thing. Applying them to real, messy kitchen situations is another. Let's tackle some of the most common questions that pop up once you start thinking about these principles.
Putting It All Together: Your Next Bake
So, you've read through all ten. It might feel like a lot. Don't try to master them all on your next project. Pick one rule to focus on. Maybe on your next batch of chocolate chip cookies, you're hyper-focused on measuring your flour correctly with the spoon-and-level method. Notice the difference in texture.
Then, the time after that, make sure your butter and eggs are truly room temperature. See how much fluffier your cookie dough gets.
Baking mastery is built one rule, one batch, one lesson at a time. Every failure (and you will have them, I still do) is just data. It tells you which rule to investigate next.
The beauty of these 10 basic baking rules is that they are constant. They don't change with trends. They are the foundation upon which every beautiful loaf, every perfect cookie, every soaring cake is built. Internalize them. Practice them. Let them become your kitchen instincts.
Now, go preheat your oven. You've got this.
Leave a Comment