Quick Navigation
Let's be honest. We've all been there. You see a gorgeous picture of gooey, soft, perfectly spiraled cinnamon rolls on some food blog. You follow the recipe to the letter. You wait for hours. And what comes out of the oven? Something closer to a sweet, cinnamony brick than the cloud-like pillows you dreamed of. Heartbreaking, right?
I've thrown away more failed batches of cinnamon roll dough than I care to admit. Dense, dry, undercooked in the middle, yeast that decided to take a permanent nap—you name it, I've baked it. It took me years of tweaking, asking old-school bakers, and frankly, a lot of stubbornness to land on a method that's not just good, but reliably spectacular.
This isn't just another cinnamon roll recipe. It's the blueprint. We're going to dig into the why behind every step, so you're not just following instructions, you're understanding the process. That's the real secret to consistent success. Forget the intimidation. By the end of this, you'll have a foolproof cinnamon roll recipe in your back pocket that will make your kitchen smell like heaven and earn you permanent brunch-host status.
Your Foundation: The Only Cinnamon Roll Dough Recipe You'll Ever Need
Everything starts with the dough. A great cinnamon roll is about texture first, flavor second (though the flavor is obviously incredible). That perfect texture—tender, feathery, pulls apart without being gummy—comes from a specific balance. Here’s my go-to base, with some notes on why it works so well.
Gathering Your Ingredients (No Fancy Stuff, I Promise)
You don't need bread flour or special yeast. All-purpose flour is perfect because we want tenderness, not enormous chew. Instant yeast is my hero—it mixes right in with the dry ingredients, no proofing needed. But active dry works fine too; you'd just dissolve it in the warm milk first.
- Warm Milk (around 110°F/43°C): This wakes up the yeast. Think bathwater warm, not hot. Too hot and you kill it. If it's comfortable on your wrist, it's good for the yeast.
- Granulated Sugar: Food for the yeast, plus a touch of sweetness.
- Unsalted Butter, melted: For richness and tenderness. Salted butter can work in a pinch, but then you'd slightly reduce the added salt.
- Large Egg, at room temp: Adds structure and richness. A cold egg can slow down your yeast party.
- All-Purpose Flour: The workhorse. I usually need between 4 to 4.5 cups, but we'll add it gradually.
- Instant Yeast: One standard packet (about 2 1/4 teaspoons).
- Salt: Crucial for flavor balance. Don't skip it.
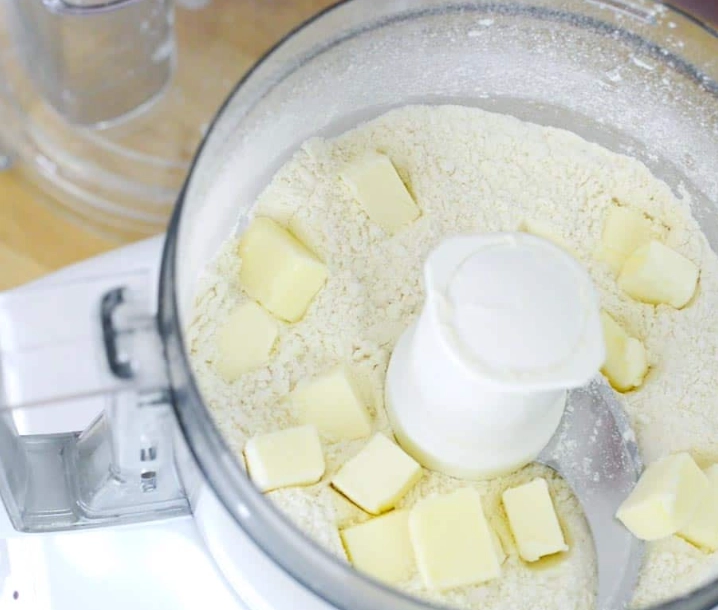
The Step-By-Step Mix & Knead (Your Hands Are Fine)
You can use a stand mixer with a dough hook, but I often just use a wooden spoon and my hands. It's therapeutic.
- Whisk the warm milk, sugar, and melted butter in a big bowl. Crack in the egg and whisk until it's all one happy, pale yellow liquid.
- In a separate bowl, whisk together 4 cups of the flour, the instant yeast, and salt.
- Gradually add the dry stuff to the wet, stirring with a sturdy spoon. It'll get shaggy and difficult. That's good.
- Dump the dough onto a lightly floured surface. Now, the kneading. You're not trying to win a strength contest. Use the heel of your hand to push the dough away from you, then fold it back over, give it a quarter turn, and repeat. Add tiny sprinkles of the reserved flour only if the dough is sticking to your hands like glue. We want it slightly tacky, not dry. Knead for about 8-10 minutes. It's done when it's smooth, springs back slowly when poked, and forms a soft ball.
Place the dough ball in a lightly greased bowl, cover it with a damp kitchen towel or plastic wrap, and let it rise. Where? Anywhere draft-free. The top of the fridge, an off oven, a sunny corner. Let it double in size. This can take 1 to 2 hours depending on your kitchen's warmth. Don't rush it by putting it somewhere super hot—slow and steady gives better flavor.
The Heart of the Matter: Cinnamon-Sugar Filling & Assembly Secrets
Okay, your dough is puffed up and beautiful. Now the fun part. The classic filling is simple but transformative. The real magic is in how you put it together.
Softened butter is non-negotiable here.
For the filling, you'll need:
- Very soft unsalted butter: About 1/2 cup. Leave it on the counter for a good hour. Microwaving can create hot spots that melt the dough.
- Brown sugar (light or dark): Dark brown has more molasses for a deeper flavor. I use 3/4 cup, packed tight.
- Ground cinnamon: The star! Use 2-3 tablespoons. Yes, tablespoons. Don't be shy. Freshness matters—if your cinnamon smells faint, it's time for a new jar.
- A pinch of salt to balance the sweetness.
Mix the brown sugar, cinnamon, and salt in a bowl. That's it. No need to mix the butter in yet.
Rolling, Filling, and Cutting Like a Pro
Gently punch down the risen dough to release the air. Turn it out onto a lightly floured surface. Using a rolling pin, roll it into a large rectangle, roughly 16x12 inches. Don't obsess over perfect corners.
Now, take that very soft butter and spread it evenly over the entire surface, leaving just a 1/2-inch border along one of the long edges (this will be your seal). Sprinkle the cinnamon-sugar mixture evenly over the butter, pressing it down gently with your hands.
Starting with the long edge opposite the bare border, tightly roll the dough into a log. Pinch the bare edge firmly to seal it. You should have a nice, plump log.
Here's a game-changing tip for cutting: don't use a knife. It squishes the beautiful swirls. Use unflavored dental floss or sewing thread. Slide a 12-inch piece under the log, cross the ends over the top where you want to cut, and pull. It slices through cleanly without compressing the dough. Aim for 12 equal pieces.
Place the rolls cut-side up in a greased 9x13 inch baking pan. They should be cozy but not crammed—they'll expand again. At this point, you have a choice: bake now, or do an overnight rise in the fridge for fresh-baked morning rolls.
Baking to Perfection & The Frosting Finale
Cover the pan and let the rolls rise again until they're puffy and nearly doubled, about 30-45 minutes. They should look like they're snuggling up against each other. Meanwhile, preheat your oven to 350°F (175°C). Not hotter. A moderate oven ensures the centers bake through before the tops get too dark.
Bake for 22-28 minutes. The tops should be golden brown, and the center of the center roll should feel set when gently pressed. An instant-read thermometer inserted into the center of a roll should read around 190°F (88°C).
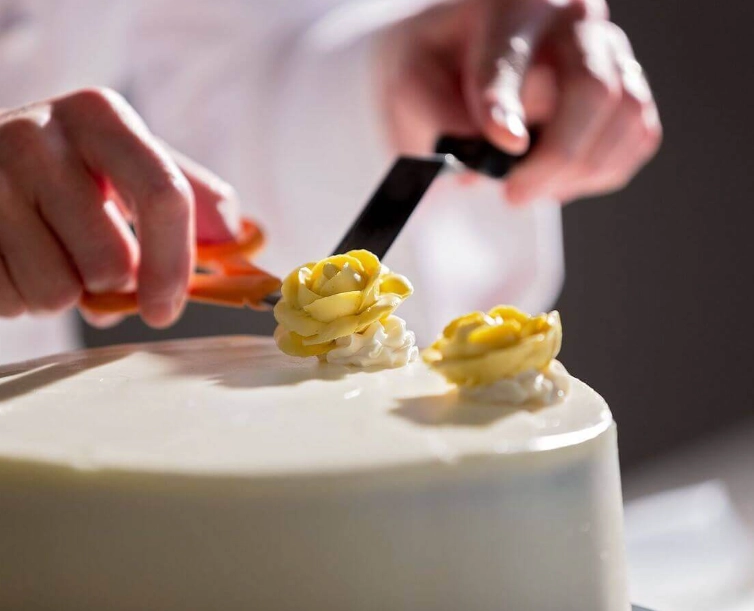
Let them cool in the pan for about 10 minutes before frosting. Why? If you slather frosting on piping hot rolls, it will just melt into a sad, transparent puddle. A little warmth is good—it helps the frosting settle in—but you don't want a lava flow.
Cream Cheese Frosting: The Only Acceptable Topping
You can make a simple glaze with powdered sugar and milk, but let's be real. Cream cheese frosting is the soulmate of a great cinnamon roll recipe. Tangy, rich, creamy—it cuts the sweetness perfectly.
Beat together:
- 4 ounces of full-fat brick cream cheese, softened
- 1/4 cup (4 tablespoons) unsalted butter, softened
- 1 cup of powdered sugar (sifted if it's lumpy)
- 1 teaspoon of pure vanilla extract
- A tiny pinch of salt
Whip it until it's smooth and fluffy. Spread it generously over the warm rolls. The residual heat will make it slightly ooze into all the nooks and crannies. It's a beautiful thing.
Leveling Up: Variations & Expert Troubleshooting
Once you've mastered the basic cinnamon roll recipe, the world is your oyster. Or your cinnamon bun.
Popular Flavor Twists
- Apple Cinnamon: Add 1 cup of finely chopped, peeled apples (like Granny Smith) tossed with a tablespoon of the cinnamon sugar to the filling.
- Pumpkin Spice: Replace 1/4 cup of the milk in the dough with canned pumpkin puree, and add a teaspoon of pumpkin pie spice to the filling.
- Orange Cardamom: Add the zest of one orange to the dough, and 1/2 teaspoon of ground cardamom to the cinnamon-sugar filling.
The Ultimate Troubleshooting Guide
This table covers the most common cinnamon roll disasters and how to fix them next time. I've encountered most of these firsthand.
| Problem | Likely Cause | How to Prevent It Next Time |
|---|---|---|
| Dense, heavy rolls | 1. Yeast was dead (old or killed by too-hot liquid). 2. Dough didn't rise long enough. 3. Too much flour worked in during kneading. |
1. Check yeast expiration. Test liquid temp on your wrist. 2. Let dough double fully—time is a guide, not a rule. 3. Add flour sparingly; dough should be tacky, not dry. |
| Dry rolls | 1. Over-baking. 2. Too much flour in dough. 3. Not enough fat (butter) in dough or filling. |
1. Use a timer and check for golden tops, not dark brown. 2. Measure flour by spooning into cup and leveling. 3. Don't reduce butter—it's key for moisture. |
| Dough didn't rise | 1. Yeast issue (old, dead, wrong liquid temp). 2. Kitchen was too cold. 3. Salt killed the yeast (if mixed directly with it). |
1. Use instant yeast mixed with flour to buffer it from salt. 2. Find a warm, draft-free spot (like an oven with the light on). 3. Ensure your liquid is warm, not hot. |
| Filling leaked out everywhere | 1. Butter was melted, not softened. 2. Roll was sliced before baking, not sealed properly. 3. Overfilled (rare, but possible). |
1. Use softened butter to spread. 2. Pinch the seam tightly and use floss to cut cleanly. 3. Ensure a small border when spreading filling. |
| Undercooked, doughy centers | 1. Oven temp too high (browns outside before inside cooks). 2. Rolls were too crowded in pan. 3. Not baked long enough. |
1. Bake at 350°F, not 375°F or higher. 2. Use the right size pan (9x13 is standard). 3. Use the poke test or a thermometer (190°F internally). |
See? Most problems have a logical fix. Baking is science you can eat.
Answering Your Cinnamon Roll Questions
Over the years, I've gotten the same questions from friends and family trying this cinnamon roll recipe. Here are the big ones.
So there you have it. From a dough that actually rises to a frosting that doesn't disappear, this guide aims to cover every hiccup and question. It's the cinnamon roll recipe I wish I had when I started. Don't just save it—print it, spill butter on it, make it yours. Then get baking. That smell of cinnamon and yeast and sugar is about to become your favorite weekend ritual.

Leave a Comment